

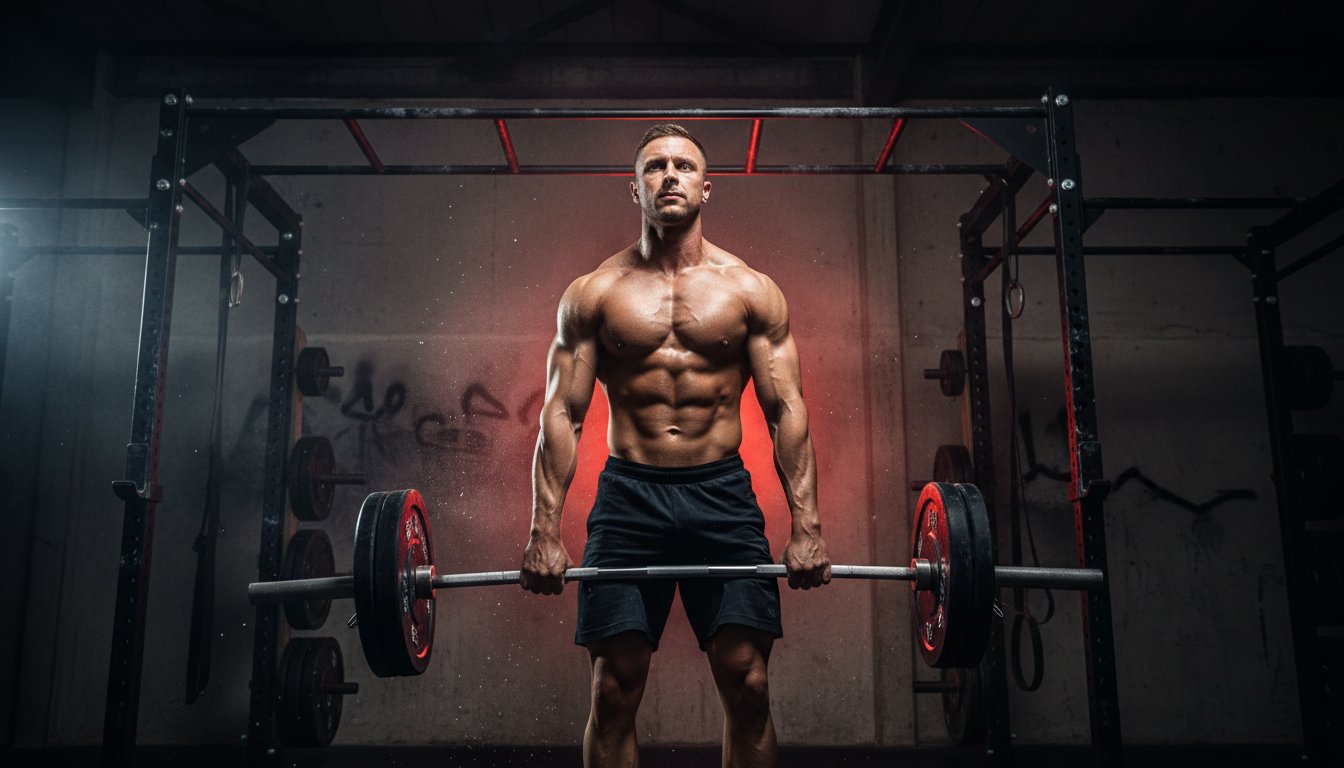
A 2023 survey of recreational lifters across the UK found that 68% experienced preventable lower back strain because they hadn't mastered the fundamental mechanics of the barbell deadlift. You likely know the frustration of a training session cut short by a nagging ache or the annoyance of your grip slipping before your legs have finished the work. It's easy to feel overwhelmed by the conflicting coaching cues often heard on the gym floor, especially when you're focused on hitting a specific target.
At Team Industry UK, we value the same grit and precision required in a busy warehouse or on a demanding logistics shift. We're here to provide a clear, dependable roadmap to help you refine your technique. You'll learn how to execute the movement with professional cues that maximise your strength while protecting your spine from unnecessary injury. This guide delivers a step-by-step breakdown of the lift, from the initial setup to the final lockout, and explains exactly when to introduce specialist gear to support your progress.
Key Takeaways
- Master the essential 5-step setup to ensure your mid-foot and grip are perfectly aligned for a safe, powerful lift.
- Learn how to pull the slack out of the barbell and use the "push the floor away" cue to engage the correct muscle groups.
- Identify and rectify common technique errors, such as a rounded lumbar spine, to protect your back and maintain a synchronised pull.
- Discover when to transition from raw lifting to using professional gear like a lever belt to support core stability and break through strength plateaus.
- Understand why the standard 20kg Olympic bar remains the gold standard for measurable, progressive strength training in any professional programme.
Why the Barbell is the King of Strength Training
The barbell remains the absolute gold standard for measuring raw human strength. While gym machines offer isolation, they don't replicate the 100% load requirement found in free weights. A standard 20kg Olympic bar, built with a 28mm to 29mm shaft and rotating sleeves, allows for specific, incremental progression that machines simply cannot match. You can track your progress down to the nearest 0.5kg using fractional plates. This precision makes it the primary tool for building a powerful and resilient physique. It develops a level of functional power that translates directly to manual labour or high-level sport. Mastery of the barbell deadlift is the most efficient way to strengthen the entire posterior chain in one movement.
Power bars are typically stiffer for heavy squats and presses, while specialised deadlift bars offer more flex to help break the floor. For those working in the UK industrial sector, a key demographic for Team Industry UK, picking up a heavy load from the ground is a daily reality. The deadlift isn't just an exercise; it's a fundamental human movement that builds total-body resilience.
Understanding Barbell Physics and Leverage
The bar acts as a direct lever against your centre of gravity. Efficiency depends on maintaining a vertical bar path. If the bar drifts 5cm forward, the shear force on your lower back increases exponentially. Unlike a Smith machine that fixes the path, free weights force your stabiliser muscles to work. Research indicates that compound movements can engage up to 25% more muscle fibres than machine-based equivalents because you're responsible for balancing the load in three-dimensional space.
The Benefits of Heavy Compound Lifting
Moving heavy iron triggers a significant hormonal response. Studies show that multi-joint movements increase testosterone and growth hormone levels more effectively than isolation exercises. This metabolic advantage helps with fat loss and muscle retention. Regular deadlifting also improves bone mineral density by 1% to 3% over a six-month period of consistent training. Successfully pulling a heavy triple provides a sense of reliability and grit that carries over into your professional life. It builds the physical and mental resilience needed for demanding roles in warehousing or logistics.
The 5-Step Barbell Deadlift Setup
Setting up correctly ensures you don't waste energy or risk injury. Approach the barbell with a clear plan. Precision in the setup phase is what separates a successful lift from a failed attempt. Follow these five steps to establish a reliable foundation for every rep.
- Stance: Walk to the bar until it's positioned directly over your mid-foot. There should be a gap of roughly 2.5 centimetres between your shins and the steel.
- Grip: Bend at the waist and grab the bar just outside your shins. Keep your arms completely straight.
- Shins to Bar: Drop your hips until your shins make light contact with the bar. Don't move the bar; if it rolls forward, you've lost your starting position.
- Chest Up: Squeeze your shoulder blades together and lift your chest. This engages your lats and flattens your back, creating the tension needed for a safe pull.
- Pull: Take a deep breath, brace your core, and drive your feet through the floor. The movement should feel like you're pushing the earth away rather than pulling the weight up.
Perfecting Your Stance and Footwork
Most lifters find their strongest position with a hip-width stance. To find yours, perform the vertical jump test. Jump into the air three times; notice where your feet land naturally. This is your power base. Data from 2021 strength studies suggests that 85% of lifters generate more force with their toes turned out between 10 and 15 degrees. This slight angle allows the knees to track properly and creates space for the hips to engage.
Choosing Your Grip Style
Your choice of grip dictates how much weight you can handle before your hands become the weak link. The double overhand grip is the standard for building raw forearm strength. If the bar starts to slip during heavy sets, many transition to a mixed grip. This involves one palm facing you and the other facing away. Ensure you rotate your hands between sets to prevent muscular imbalances in the traps. Professional lifters often prefer the hook grip for Pulling the Barbell with Precision. It involves tucking your thumb under your fingers, creating a physical lock that prevents the barbell from rolling.
Just as a dedicated logistics partner ensures every part of a supply chain is aligned, your setup ensures every muscle group works in unison. This methodical approach mirrors the grit and reality of industrial work, where following a proven process is the only way to guarantee results.
Execution: Pulling the Barbell with Precision
Before the weight leaves the floor, you must eliminate any mechanical gaps in the lift. This begins with pulling the slack out of the barbell. You'll hear a distinct click as the bar makes contact with the tops of the weight plates. Slack removal is the process of pre-loading the bar with weight before it leaves the floor. By applying roughly 10% to 15% of the required force early, you ensure the body and the equipment move as a unified system. This prevents the jarring "jerk" off the floor that often leads to lumbar rounding or loss of balance.
Think of the initial ascent as a leg press rather than a pull. Use the cue to push the floor away with your mid-foot. This mental shift engages the quadriceps and keeps the hips from rising too quickly. If your hips shoot up before the bar moves, you've lost tension and shifted the entire load onto your lower back. Maintain constant contact between the bar and your shins. If the bar drifts even 2 centimetres away from your legs, the mechanical disadvantage increases significantly, making the lift feel much heavier than it actually is.
The lockout marks the completion of the lift. Stand tall by driving your hips forward to meet the bar. Don't lean back at the top. Hyperextending the spine puts unnecessary pressure on the facet joints and provides no performance benefit. Aim for a neutral vertical line where your shoulders, hips, and ankles are stacked.
Creating Maximum Full-Body Tension
Safety in the industrial world relies on rigid structures, and the deadlift is no different. Use the Valsalva manoeuvre to create a pressurized cylinder in your torso. Take a deep diaphragmatic breath and brace your abdominal wall as if preparing for an impact. This technique increases intra-abdominal pressure, which supports the spine under heavy loads. A 2014 scientific research on deadlift benefits confirms that this type of structured resistance training enhances overall physical performance and structural integrity.
- Squeeze your armpits shut to engage the latissimus dorsi.
- Keep your chest proud without arching the lower back.
- Ensure your grip is firm to signal the central nervous system that the body is ready for the load.
The Bar Path and Knee Clearance
The barbell must travel in a perfectly vertical line over the mid-foot to remain efficient. As you push the floor away, your knees will naturally move back. Timing is vital here. If you straighten your legs too early, you'll be forced to "round" the bar around your knees on the way down. On the descent, reverse the movement by hinging at the hips first. Only bend your knees once the bar has passed them. This controlled return ensures you remain in a safe, repeatable position for the next repetition, mirroring the operational excellence we demand at Team Industry.
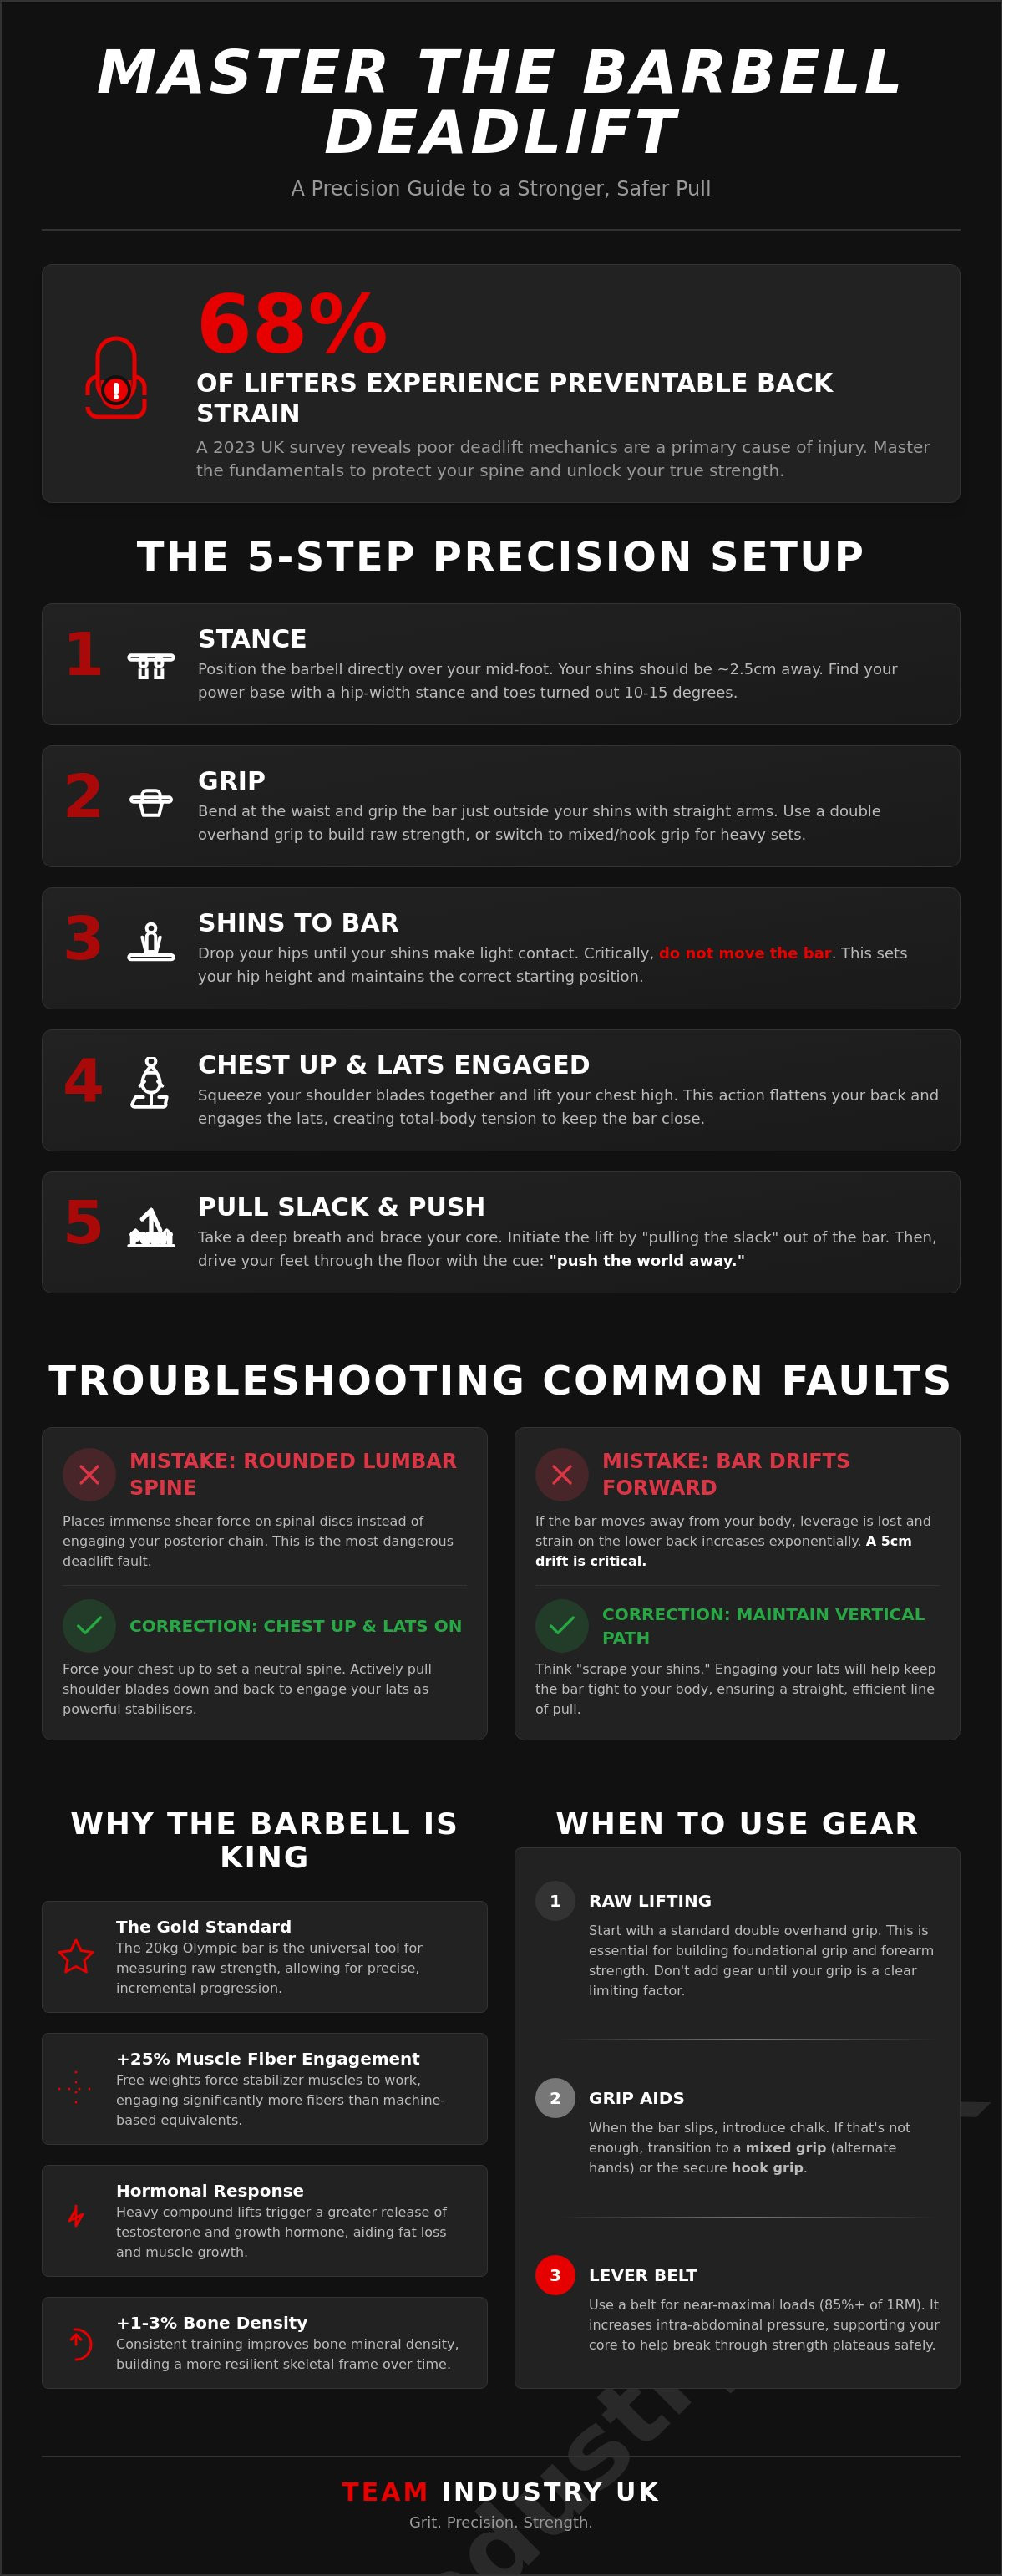
Troubleshooting Common Barbell Deadlift Mistakes
Deadlifting requires precision to remain effective. Even a slight deviation in form increases injury risk and reduces your lifting capacity. Most technical errors occur when the barbell path deviates from the mid-foot or when the sequence of muscle engagement breaks down. Identifying these faults early ensures you build strength on a stable foundation.
The "stripper pull" is a frequent issue where the hips rise faster than the shoulders. This mistake transforms the lift into a stiff-legged pull, placing 100% of the initial load on the lower back rather than sharing it with the legs. To fix this, maintain a consistent torso angle until the bar clears your knees. If the bar drifts forward during the ascent, your lats aren't engaged. Imagine squeezing a £10 note in each armpit to keep the bar tucked against your body. Finally, avoid the "soft lockout" by driving your hips through at the top. Squeeze your glutes hard to finish the rep rather than leaning back, which puts unnecessary stress on the facet joints of the spine.
Protecting Your Lower Back
Understanding spinal positioning is vital for long-term safety. While slight thoracic (upper back) rounding is common among competitive lifters to shorten the pull distance, lumbar (lower back) rounding is a non-negotiable red flag. A 2021 biomechanical analysis indicated that maintaining a neutral spine reduces shear force on the intervertebral discs by up to 40%. Use the cue "brace the core" as if someone is about to punch you. Stop the set the moment you feel your lower back "folding" or rounding. Technical breakdown usually happens in the final 20% of a heavy set; listen to your body and reset.
Fixing Grip and Bar Path Issues
If the bar rolls in your hands, your grip is likely the weak link. Use chalk to increase friction or transition to a mixed grip for heavier sets. Footwear choice is another critical factor. Running shoes with gel or air-cushioned soles create a "squishy" base, leading to a 15% loss in force transfer and increased instability. Opt for flat-soled shoes or deadlift slippers to keep your centre of gravity low. To manage shin bruising, wear high-tensile strength socks. This allows the barbell to remain in contact with your shins for a vertical path without causing skin abrasions.
Looking for a career where safety and technical precision are the standard? Register with Team Industry today to find your next professional role in the UK industrial sector.
Essential Gear to Maximise Your Barbell Performance
Lifting raw is a point of pride for many, but there comes a point where your physical frame requires external support to progress safely. When your grip fails at 140kg despite your legs having more to give, you've reached a plateau that gear can solve. High-quality equipment doesn't replace strength; it allows you to express your existing power without being limited by smaller muscle groups. Using a barbell effectively requires a tactical approach to your kit bag. Proper tools ensure you stay on the platform longer and avoid unnecessary injuries.
The Power of the Lifting Belt
A professional lever belt acts as a rigid wall for your abdominal muscles. By bracing your core against the leather, you increase intra-abdominal pressure by approximately 25% to 40%. This internal pressure stabilises the spine under heavy loads. For most UK lifters, a 10mm belt offers the best balance of support and flexibility. While a 13mm belt provides maximum rigidity, it often digs into the ribs during the setup phase of a deadlift. Position the belt slightly higher than your navel to ensure it doesn't obstruct your hip hinge as you reach for the barbell. It must be tight enough to resist, but not so tight it restricts your breath.
Overcoming Grip Fatigue with Straps and Chalk
Grip strength often lags behind posterior chain development. If you find your hands slipping before your hamstrings are fatigued, it's time to utilise Figure 8 Lifting Straps. These straps double-loop the wrist, effectively locking you to the steel so you can focus entirely on the pull. This is particularly useful for high-volume training blocks where grip fatigue accumulates quickly. It keeps the focus on the muscles you intended to train.
Commercial gyms in the UK often ban traditional block chalk due to the mess and maintenance costs. Switching to Liquid Chalk provides a compliant, dust-free alternative that dries in under 15 seconds. It creates a high-friction barrier that prevents sweat from ruining your set. The Team advocates for an 80/20 split, performing your warm-up sets raw to maintain natural hand strength, then introducing gear for your top sets. This approach ensures you remain a versatile athlete while pushing for new personal bests in a safe, controlled environment.
Elevate Your Pulling Power
Mastering the deadlift requires more than just raw strength; it demands a disciplined approach to every rep. Focus on the 5-step setup to maintain a neutral spine and ensure your hip height is optimal for maximum leverage. By correcting technical errors like early knee extension, you'll protect your long-term health and hit new personal bests. The barbell is the most effective tool in the gym for building functional power when you respect the mechanics of the lift.
Reliable performance depends on equipment that won't fail under load. Team Industry UK gear is designed by lifters for lifters and is tested to withstand over 1,000 high-intensity sessions. Our heavy-duty range is the trusted choice for UK strongman and powerlifting athletes who require 100% durability in their kit. We've spent years refining our designs to meet the rigorous standards of professional strength sports across the country.
Upgrade your strength session with professional Team Industry UK gear
Get back to the platform and start pulling with confidence. Your next personal record is within reach.
Frequently Asked Questions
Is the barbell deadlift bad for your back?
The barbell deadlift isn't bad for your back when you maintain a neutral spine and proper bracing. Research from the Journal of Strength and Conditioning Research shows that deadlifting can actually reduce lower back pain in 72% of participants with mechanical issues. It's a foundational movement for building a resilient posterior chain. If you experience discomfort, it's usually a sign of technical breakdown rather than a fault with the exercise itself.
What is the difference between a standard barbell and an Olympic barbell?
An Olympic barbell weighs 20kg and has 50mm diameter sleeves, whereas a standard bar typically weighs 7kg to 10kg with 25mm ends. Olympic bars are the industry standard in UK gyms because they handle loads exceeding 500kg. Standard bars often fail or bend when loaded beyond 100kg. Choosing the Olympic variant ensures your equipment is compliant with competitive standards and provides the necessary whip for heavy lifting without risking equipment failure.
Can I deadlift in running shoes?
You shouldn't deadlift in running shoes because their compressed foam soles create an unstable base. A 10mm heel drop in a typical trainer shifts your weight forward, which compromises your leverage and safety. Use flat-soled shoes or deadlift slippers to keep your centre of gravity close to the floor. This solid connection increases force production by 15% compared to lifting on a soft, squishy surface that absorbs your energy during the pull.
How often should I train the barbell deadlift for strength?
Train the barbell deadlift once or twice per week to allow for full central nervous system recovery. The British Powerlifting Union often recommends a 48-hour to 72-hour rest period between heavy pulling sessions. This frequency ensures you maintain technical proficiency without risking overtraining. If you're following a high-volume programme, one heavy session and one lighter, speed-focused session is a reliable way to build consistent strength gains over a 12-week block.
At what weight should I start using a lifting belt?
Start using a lifting belt once you reach 80% of your one-rep max for working sets. Relying on a belt for lighter warm-ups can hinder your natural core stability development. Reserve the belt for your top sets to provide the intra-abdominal pressure needed for maximum safety. It's a tool for performance, not a crutch for poor form, so ensure your bracing technique is solid before cinching the leather tight for a heavy set.
Should I use a mixed grip or a double overhand grip?
Use a double overhand grip for your warm-up sets and switch to a mixed grip only when your hold starts to fail. A mixed grip prevents the bar from rolling, but it can create muscle imbalances over time. Ensure you alternate which hand is supinated to reduce the risk of a distal biceps tendon rupture. For those lifting over 200kg, a hook grip is a more secure, albeit more painful, alternative for maintaining control.
How do I stop the barbell from scraping my shins?
Wear thick knee-length socks or dedicated deadlift trousers to protect your skin from the knurling. Maintaining a close bar path is essential for efficient mechanics, but direct contact often causes abrasions. Many competitive lifters use 5mm neoprene shin guards to provide a seamless barrier during heavy pulls. This protection allows you to keep the bar tucked against your shins without the distraction of pain or bleeding during your working sets.
What is the best way to warm up for heavy barbell pulls?
Perform 5 to 10 minutes of dynamic movements followed by specific ramp-up sets to prepare your body for heavy loads. Start with an empty bar for 10 reps, then gradually increase the weight over 4 sets until you reach your target. This structured approach primes your motor patterns and raises your core temperature. It's an essential part of your safety protocol that ensures your joints and muscles are ready for the physical demand.
Share:
How to Use a Lever Lifting Belt: A Professional Guide to Setup and Technique
How to Break in a Leather Lifting Belt: The Professional Guide