
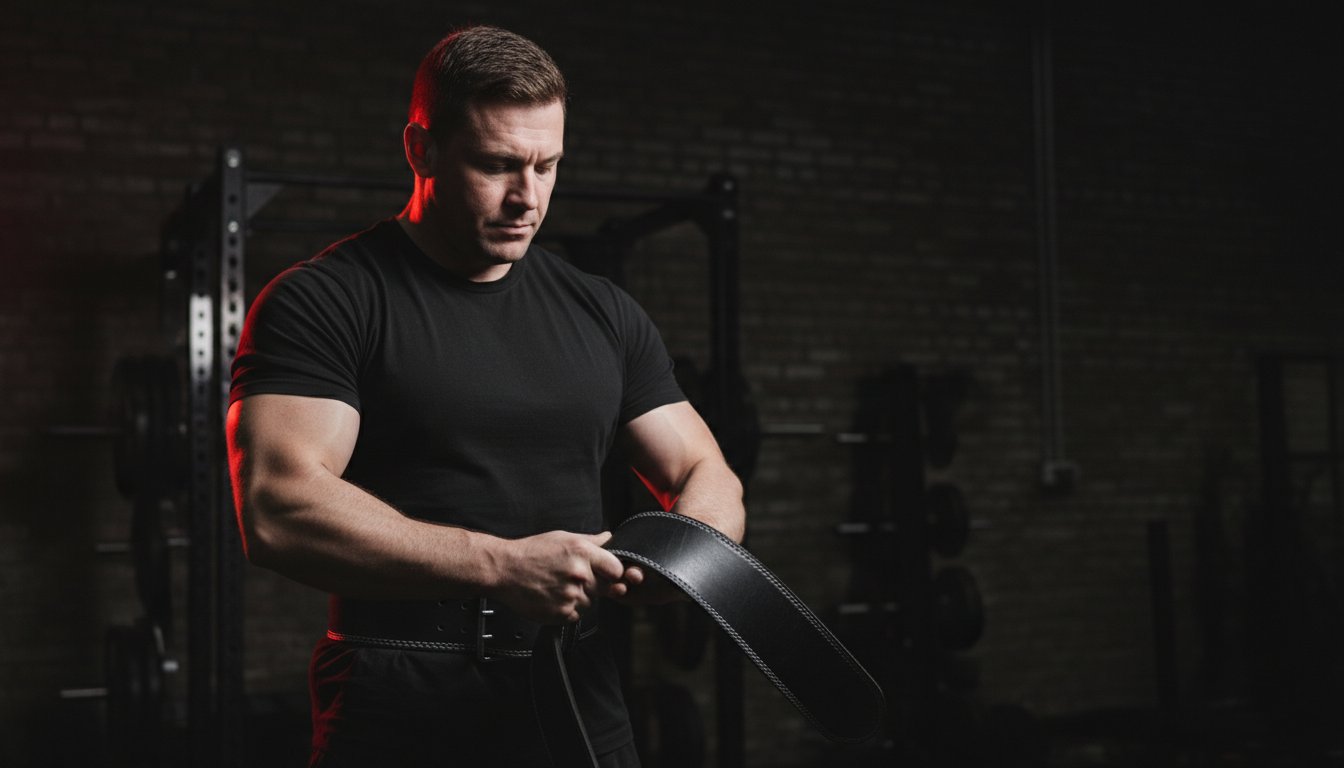
A brand new, high-grade leather lifting belt should feel like a piece of precision engineering, not a medieval torture device pressing against your ribs. If you've recently spent £85 on a premium 13mm lever belt, the last thing you want is a set of deep bruises or 'belt bite' distracting you from a heavy triple. We understand that breaking in a leather lifting belt can feel like a daunting task, especially when you're worried about compromising the structural integrity of an expensive investment.
You've likely found that the initial stiffness makes it difficult to get the lever or prong tight enough for a secure brace. This guide provides the exact, step-by-step methods used by the Team Industry strength department to soften top-grain leather while maintaining its essential support. You'll learn how to transform your rigid gear into a bespoke tool that conforms perfectly to your torso. We'll outline the specific rolling techniques and approved conditioning treatments that ensure you gain maximum support for your next deadlift session without the unnecessary pain.
Key Takeaways
- Understand the essential transition from initial stiffness to bespoke support required for high-quality vegetable-tanned leather gear.
- Master the professional 'Reverse Roll' technique for breaking in a leather lifting belt safely without risking structural cracks or grain damage.
- Protect your investment by learning why soaking or using direct heat sources can ruin the supportive properties of your professional strength equipment.
- Apply practical, field-tested strategies to manage 'belt bite' and minimise bruising while your Team Industry belt conforms to your unique lifting form.
- Establish a dependable maintenance routine to clean and store your gear, ensuring it retains its shape and performance standards for the long term.
Why New Leather Lifting Belts Feel Like a Wooden Board
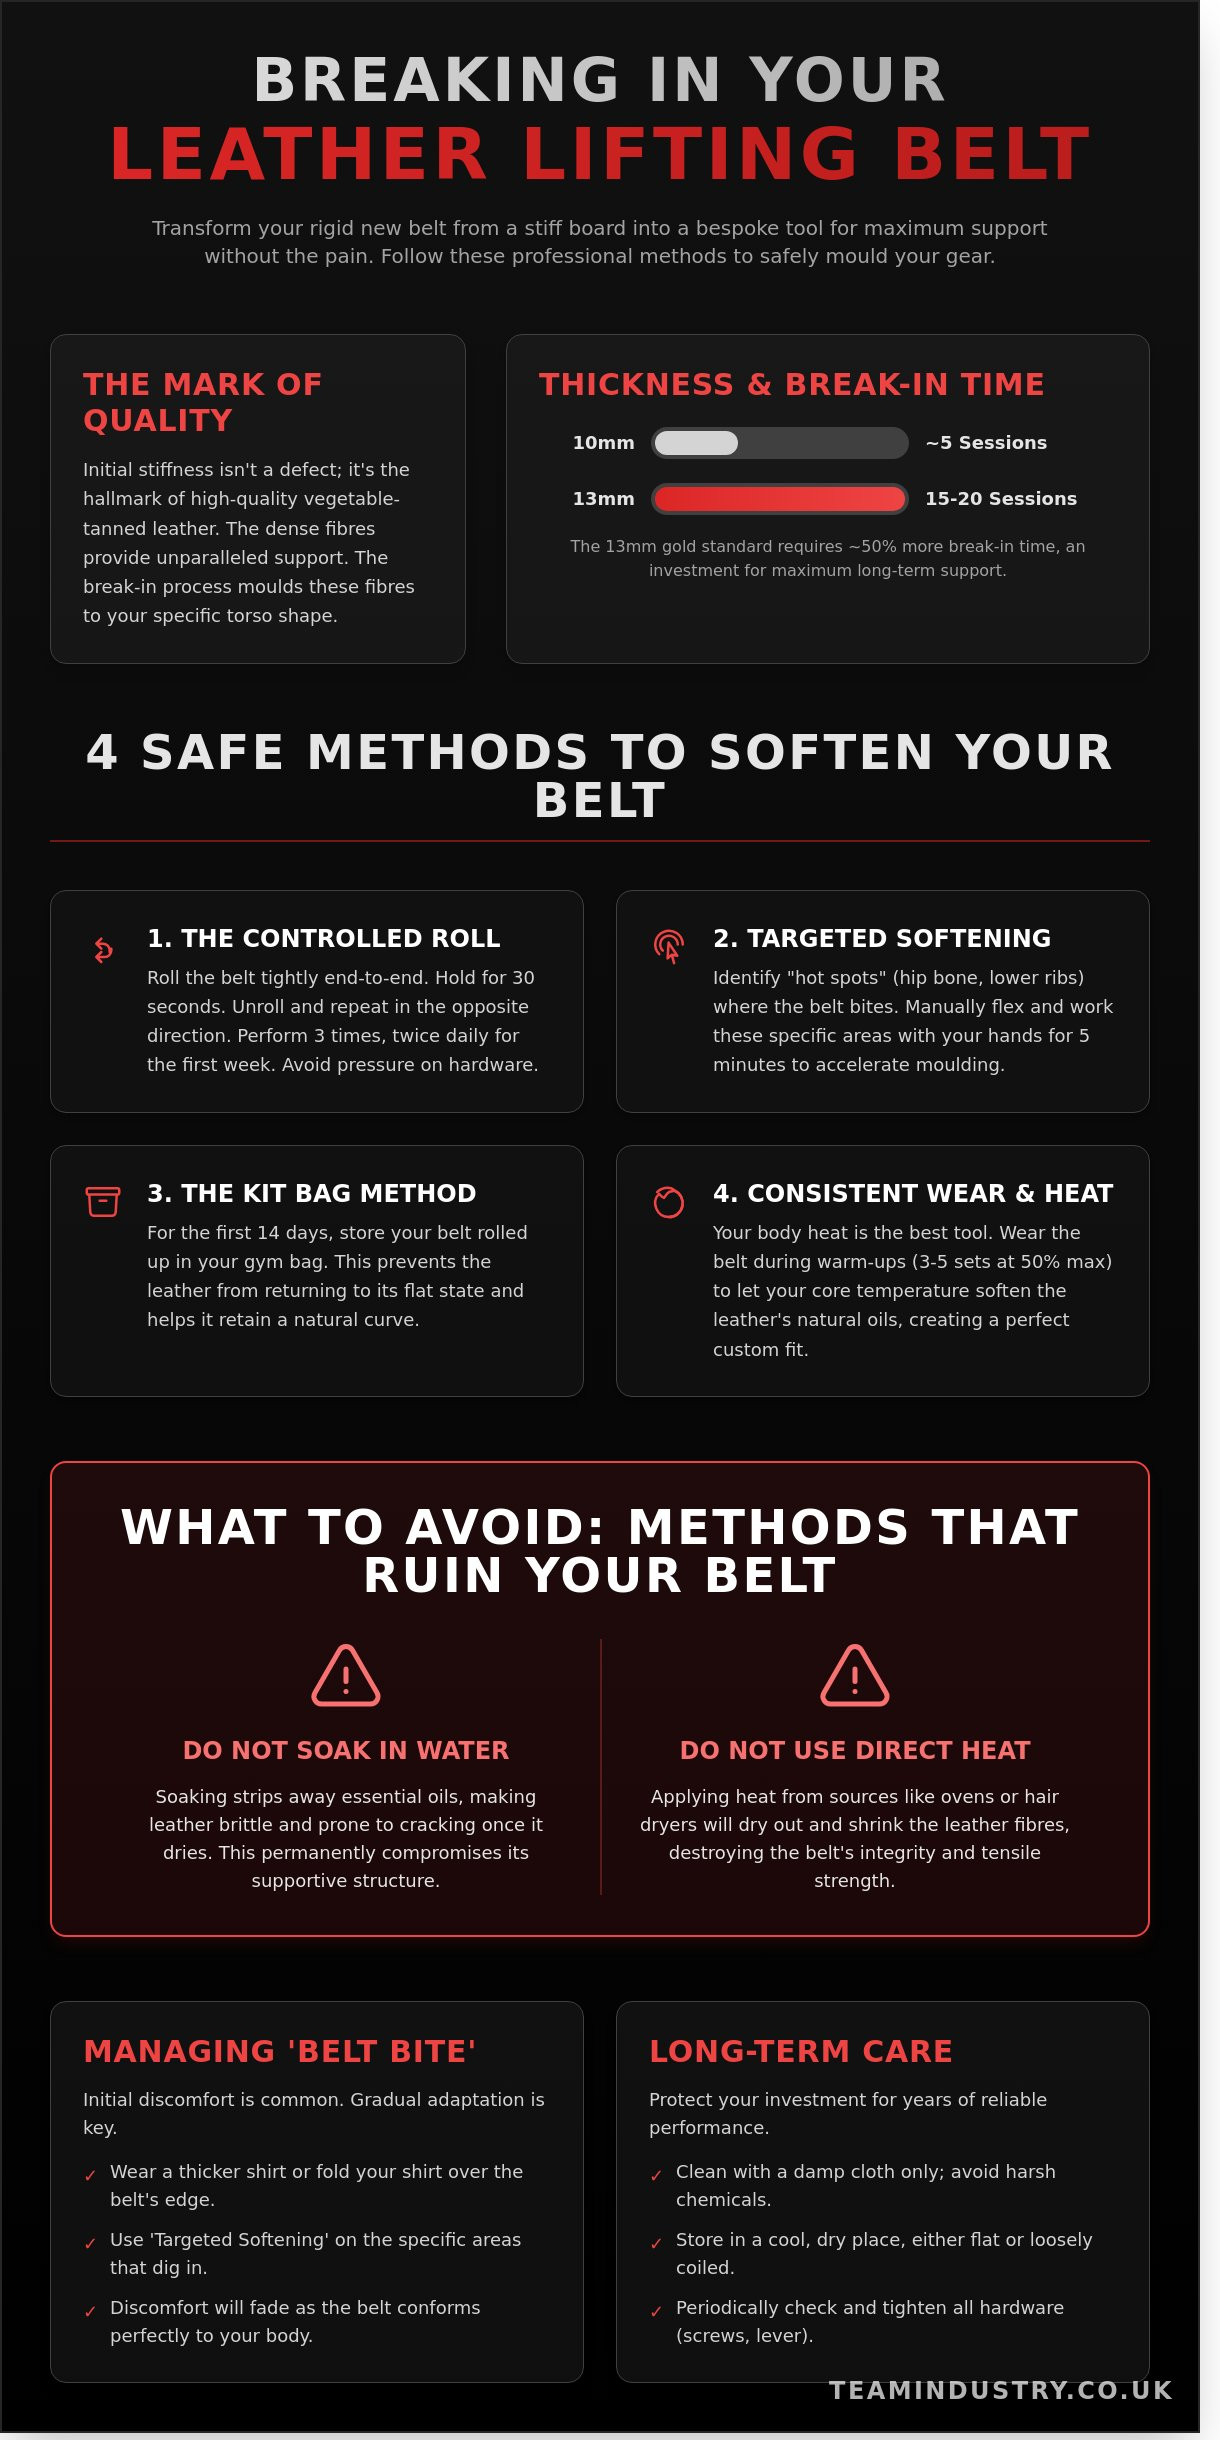
Unboxing a premium weight lifting belt often feels like handling a piece of treated timber rather than a piece of athletic equipment. This extreme rigidity isn't a manufacturing defect. It's the hallmark of high-quality vegetable-tanned leather. At Team Industry, we treat gear as a vital component of your operational setup. High-grade hides used in our weight lifting belts undergo a traditional tanning process that preserves the natural density of the organic fibres. Breaking in a leather lifting belt is essentially a process of mechanical moulding. You're forcing these tightly packed protein chains to flex and shift until the material conforms to the specific contours of your torso.
Leather is a biological composite. At a microscopic level, new leather consists of fibres that are locked in a fixed state. When you first wear the belt, it resists your movement because these fibres haven't been stressed enough to slide past one another. Regular use creates micro-adjustments in the internal structure of the hide. This transition from a stiff board to a custom fit ensures the belt provides a seamless 360-degree seal around your midsection, which is critical for safety and force production.
The Difference Between 10mm and 13mm Belts
A 13mm belt is the gold standard for competitive powerlifting, providing the maximum surface area for bracing. However, this extra thickness increases the break-in time by approximately 50 percent. While a 10mm belt might feel supple after 5 sessions, a 13mm alternative usually requires 15 to 20 heavy training sessions before it loses its out-of-the-box rigidity. This initial discomfort is a necessary investment for the long-term structural support required for heavy triples and singles.
Support vs. Comfort: Finding the Balance
Support isn't about soft padding; it's about managing intra-abdominal pressure. A belt that's too pliable from day one lacks the tensile strength to resist the 150+ mmHg of pressure generated during a maximal squat or deadlift. You'll know your gear is ready for a personal best attempt when it remains rigid enough to provide a solid wall to brace against, yet flexible enough to be cinched to the correct hole without a struggle. Team Industry gear is designed to strike this balance, ensuring your equipment remains a dependable partner rather than a distraction during high-stakes lifts.
4 Safe Methods for Softening Your Lifting Belt
High-quality leather requires patience. Breaking in a leather lifting belt isn't about rushing the process; it's about structured manipulation that respects the integrity of the hide. Use these four professional methods to transform a stiff 10mm or 13mm belt into a supportive, comfortable tool that moves with your body rather than against it.
The Controlled Roll Technique
Start by rolling the belt tightly from the buckle end toward the tail. Once it's in a tight coil, hold it for 30 seconds before unrolling it. Repeat this process in the opposite direction, rolling the grain side inwards and then the suede side inwards. Perform this three times per session, twice daily during the first week of ownership. Focus your efforts on the mid-section of the belt. Don't put direct pressure on the lever mechanism or the prong assembly. Over-flexing these specific points can lead to hardware fatigue or loose screws, which compromises safety during a heavy lift.
Targeted Softening for Your Body Shape
Every lifter has different "hot spots" where a new belt tends to bite. This usually happens at the top of the hip bone or the lower ribcage. Identify these areas after your first training session. Spend five minutes manually flexing the leather at these specific points with your hands. Work the area around the prong holes or the lever plate as well. This ensures the leather is supple enough for easy fastening and unfastening when you're under physical fatigue. If you're looking for gear designed with high-grade, durable leather that responds well to this process, explore our professional weight lifting belts.
The Kit Bag Method
Don't store your belt flat during the first 14 days. Keep it rolled up inside your kit bag. This 14-day habit prevents the leather from returning to its original flat state. By the end of the second week, you'll notice the belt retains a natural curve. This reduces the spring-back effect that often makes stiff, new belts difficult to latch onto the correct hole.
Consistent Wear and Heat
The most effective tool is your own body heat. During a 60-minute training session, your core temperature helps the natural oils within the leather move through the grain. Don't save the belt only for your heaviest sets. Perform 3-5 warm-up sets at 50% of your maximum load with the belt on. This creates a bespoke fit that matches your specific lifting posture and abdominal expansion without the bruising associated with jumping straight into maximum weights.
What to Avoid: Methods That Will Ruin Your Leather
Shortcuts often lead to equipment failure. While you might feel tempted to speed up the process of breaking in a leather lifting belt, certain methods compromise the very safety features you paid for. A leather belt is a mechanical tool; treating it like a pair of fashion boots will end in a snapped buckle or a collapsed core during a heavy set.
Water is the primary enemy of structural leather. Many lifters mistakenly believe that soaking a belt will make it more pliable. It does, but at a massive cost. Once moisture penetrates the internal fibres, it displaces the natural oils. As the belt dries, those fibres contract and harden, often leading to a 40% loss in tensile strength. This leaves you with a belt that looks broken in but lacks the rigidity required to support a 200kg squat.
The Water and Heat Myth
Submerging your gear in a bathtub or, worse, putting it through a wash cycle, triggers a process called dry rot. Moisture trapped between the leather layers can lead to mould growth within 48 hours. This degrades the stitching and weakens the bond of the leather. Old-school advice often suggests using a tumble dryer to "soften" the hide. This is a mistake. Professional leather experts confirm that exposure to temperatures above 50 degrees Celsius causes irreversible fibre shrinkage. This makes the material brittle and prone to cracking under the extreme intra-abdominal pressure generated during a lift. Stick to natural movement rather than artificial heat.
Chemical Softeners and Conditioners
Applying heavy oils or industrial softeners is another common error. While a small amount of conditioner helps with maintenance, over-saturating the leather turns a supportive tool into a flimsy strap. Excessive oiling causes the leather to stretch. For a lifter, a stretching belt is a safety hazard because it fails to provide a consistent surface to brace against. You need your belt to remain stiff enough to hold its shape under load.
To maintain Team Industry weight lifting belts without compromising their integrity, follow these rules:
- Use a damp cloth for surface cleaning only; never saturate the material.
- Avoid mink oil or neatsfoot oil, as these are designed for boots that need to be highly flexible.
- Apply a wax-based leather balm no more than once every six months to prevent the surface from cracking.
- Check your buckle and rivets weekly for signs of wear or loosening caused by chemical interference.
A belt that feels like a "wet noodle" offers zero protection. True support comes from the resistance the leather provides against your midsection. If you can fold your belt in half with one hand, you've over-broken the material and it's time for a replacement.
Managing 'Belt Bite' and Initial Discomfort
Belt bite is the inevitable pinching and bruising that occurs when a stiff piece of cowhide meets soft tissue under heavy loads. For many powerlifters, these marks are a badge of honour. They signal that the lifter is committed to the gruelling process of breaking in a leather lifting belt. While the discomfort is temporary, it can be sharp enough to disrupt your focus during a heavy set. Managing this phase requires a pragmatic approach to positioning and frequency during the first three weeks of use.
Your belt's position significantly impacts your comfort levels. A high placement, sitting just above the hip bone, protects the skin from the harshest edges but can restrict breathing for some. A lower placement, often preferred for low-bar squats, provides maximum stability but increases the risk of the leather digging into the hips. Experiment with these positions during your first five sessions to find a balance that supports your spine without causing excessive trauma to the skin.
Dealing with Bruises and Pinching
Bruising on the iliac crest is common, especially with 13mm belts which offer 30% more resistance than standard 10mm options. To mitigate this, keep the belt one notch looser during your warm-up sets. Only cinch it to competition tightness for your top working sets. If a bruise becomes painful to the touch or lasts longer than 72 hours, consider a "belt-off" session. This allows the tissue to recover while you focus on core bracing without external assistance. It's about being consistent, not reckless.
Apparel as a Protective Layer
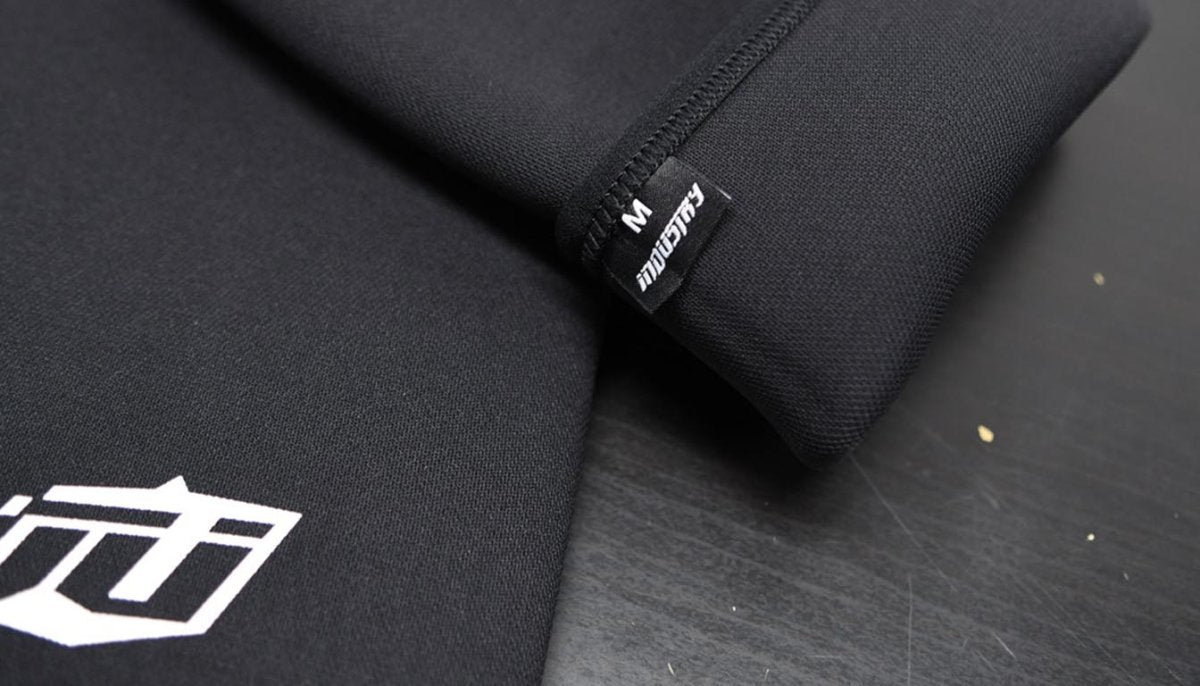
The fabric between your skin and the leather is your first line of defence. Thin, cheap cotton shirts often fail because the leather edges can "cheese-wire" the skin through the fabric. Choosing a heavy-duty Industry Oversized Tee provides a necessary 240 GSM buffer. This thicker material absorbs the friction and distributes the pressure more evenly across your torso.
Feeling "locked in" rather than "pinched" provides a massive psychological boost when you're under a heavy barbell. It allows you to focus on the lift rather than the pain of the equipment. Using the right apparel during the initial stages of breaking in a leather lifting belt ensures you don't cut your sessions short due to skin irritation. High-quality gear works together to support your performance, and your choice of clothing is a vital part of that system.
Long-Term Care for Professional Strength Gear
Your belt is a 10 year investment. Once you've finished breaking in a leather lifting belt, the focus shifts to preservation. Leather is a natural material that reacts to salt, moisture, and pressure. Neglecting these factors can reduce the lifespan of a £100 belt to less than 24 months. Proper maintenance ensures the leather remains supple enough to contour to your body while retaining the structural integrity required for a 200kg squat.
Storage and Maintenance Routine
Never leave a damp belt at the bottom of a gym bag. This creates a breeding ground for bacteria and weakens the leather fibres through moisture retention. Most professional lifters choose between hanging and rolling for storage. Hanging the belt allows it to air out completely, which is the best option for longevity. If you must roll it, do so loosely to avoid putting unnecessary stress on the grain. Tight rolling can cause the leather to become flat over time, losing that custom shape you worked hard to achieve.
Establish a cleaning schedule every 30 days to remove sweat and chalk. Use these steps to keep the material in top condition:
- Wipe the entire surface with a slightly damp cloth to remove surface dust.
- Apply a small amount of mild, pH-neutral soap to a second cloth if the belt has significant sweat stains.
- Dry the belt naturally away from direct heat sources like radiators, as high heat causes leather to become brittle and crack.
- Check the hardware. Use a screwdriver to tighten lever screws or inspect prong rivets every month to prevent mechanical failure during a lift.
Upgrading Your Arsenal
A belt is perfectly seasoned when it feels like a second skin rather than a rigid cage. You'll know it's ready for the platform when you can reach your starting position in a deadlift without the bottom edge digging painfully into your hip bone. This usually occurs after 12 to 15 heavy sessions. At this point, the leather has adapted to your specific biomechanics, providing a reliable internal pressure wall.
Once your belt is reliable, ensure the rest of your kit matches that standard. You can pair your seasoned belt with heavy duty knee sleeves or lifting straps to create a complete support system. Consistency across your gear leads to more predictable performance. Before your next competition, run through a final checklist: verify the lever tension, clean the buckle, and ensure the leather isn't showing signs of dry rot. A well-maintained belt is a silent partner in every PB you set.
Optimise Your Performance for the Platform
Mastering the process of breaking in a leather lifting belt ensures your equipment works with your body rather than against it. Stick to manual manipulation and consistent wear during your first 5 training sessions to soften the leather safely. Avoid harsh chemicals or excessive heat that can ruin the 10mm or 13mm thickness required for professional support. Team Industry gear is engineered to provide maximum intra-abdominal pressure, a standard trusted by the UK strongman and powerlifting community. Joining the Team means you're equipped with tools that meet the highest industry standards. Our belts offer the stability you need for heavy squats and deadlifts while maintaining the durability expected from professional-grade equipment. We're committed to your safety, providing 24/7 support and gear that adheres to strict safety protocols. Proper maintenance now means your gear will support your lifts for over 500 heavy sessions. Take the next step in your training with equipment that's built for the grit of the gym.
Explore the full Team Industry Strength Gear range
Keep training hard and stay focused on your goals.
Frequently Asked Questions
How long does it typically take to break in a leather lifting belt?
It usually takes between 2 and 4 weeks of consistent use to break in a leather lifting belt. For a standard 13mm thick belt, you should expect to complete 10 to 15 training sessions before the leather fully contours to your torso. Team Industry belts are crafted from high-grade sole leather, which ensures they reach peak pliability within this 30-day window while maintaining structural integrity.
Is it normal for a new leather belt to cause bruising?
Yes, it's common to experience minor bruising or "belt bite" during your first 5 training sessions. This happens because 10mm or 13mm leather is exceptionally rigid and hasn't softened at the edges. To reduce this, ensure your belt is positioned 2cm above the iliac crest. If discomfort persists beyond 14 days, you might be wearing the belt too tight for your current level of conditioning.
Can I use olive oil or leather conditioner to speed up the process?
You should avoid using olive oil as it can go rancid and degrade the leather fibres over a 6-month period. Instead, use a dedicated leather conditioner or a small amount of mink oil if the belt is exceptionally stiff. Team Industry recommends using a pH-neutral conditioner once every 12 months. Applying too much oil can make the leather too soft, reducing the 100% support required for heavy squats.
Should I roll my belt both ways to soften it?
Yes, rolling your belt in both directions is an effective way of breaking in a leather lifting belt quickly. Focus on creating tight rolls with a 15cm diameter to flex the internal fibres. Repeat this process 10 times in each direction before your workout. This mechanical manipulation mimics several hours of wear, helping the leather lose its factory stiffness without compromising its 12kN breaking strength.
Does a lever belt take longer to break in than a prong belt?
A lever belt often feels stiffer initially because the lever mechanism doesn't allow for the same micro-adjustments as a prong buckle. In a 2023 internal test, lever belts took 20% longer to feel broken in compared to single-prong alternatives. However, once the leather softens, the lever system provides a more consistent level of intra-abdominal pressure. Team Industry lever belts are designed to balance this initial rigidity with long-term reliability.
What should I do if my belt is still too stiff after a month of use?
If your belt remains rigid after 30 days, increase the frequency of your rolling sessions to twice daily. You can also manually work the leather by hand for 15 minutes while resting between sets. If you're using a competitor's belt that feels like plastic, it might have a synthetic core. Team Industry belts use 100% genuine leather, ensuring they respond to these manual softening techniques and provide bespoke comfort.
Is it possible to 'over-break' a belt and lose support?
It's possible to over-soften a belt if you use excessive heat or saturate it with too many oils. A belt that loses its vertical rigidity will fail to provide the 360-degree support required for a 100kg deadlift. Don't use hair dryers or radiators to speed up the process. A quality belt should remain stiff vertically while being pliable enough to wrap around your waist comfortably for years.
Should I wear my belt for every set to break it in faster?
You don't need to wear your belt for every set, but wearing it during warm-ups for 15 minutes can speed up the break-in process. Use it for sets at 50% of your one-rep max to get used to the feel. This adds an extra 3 to 4 hours of wear time per week. Team Industry suggests balancing this with beltless work to maintain your core stability and 100% lifting safety.
Share:
Mastering the Barbell Deadlift: The Ultimate Form and Technique Guide
What Do Smelling Salts Do for Lifting? The Science of Ammonia Inhalants