

Last Tuesday, a lifter at a local powerlifting club spent 15 minutes fumbling with a screwdriver instead of hitting their scheduled top set. It's a common sight because learning how to use a lever lifting belt involves more than just pulling a strap. You might worry that 13mm of stiff leather will leave you bruised or that an incorrect fit will compromise your stability during a 100kg squat. Team Industry understands that your gear should function as a reliable partner rather than a technical hurdle.
You likely agree that a belt must provide a rock-solid wall to brace against, yet the initial mechanical setup often feels unnecessarily complex. This guide ensures you master the precise screw placement and internal bracing techniques required to use your professional lever belt safely and effectively. We'll walk you through the assembly process, the ideal tension for 360-degree expansion, and how Team Industry's reinforced hardware provides a more seamless experience than standard budget alternatives.
Key Takeaways
- Learn how to correctly assemble and adjust your Team Industry hardware using a standard Phillips-head screwdriver for a secure, professional-grade fit.
- Identify the precise "sweet spot" on your torso to ensure maximum stability and support across different lifts like the squat and deadlift.
- Master how to use a lever lifting belt by combining the Valsalva manoeuvre with 360-degree expansion against the rigid leather wall.
- Discover the most effective professional methods for breaking in a stiff 13mm belt to achieve a supple feel without sacrificing structural integrity.
- Implement a routine maintenance schedule to ensure your lever hinge remains debris-free and your equipment stays reliable for long-term heavy lifting.
Understanding the Lever Lifting Belt: Support, Stability, and the Powerlifting Standard
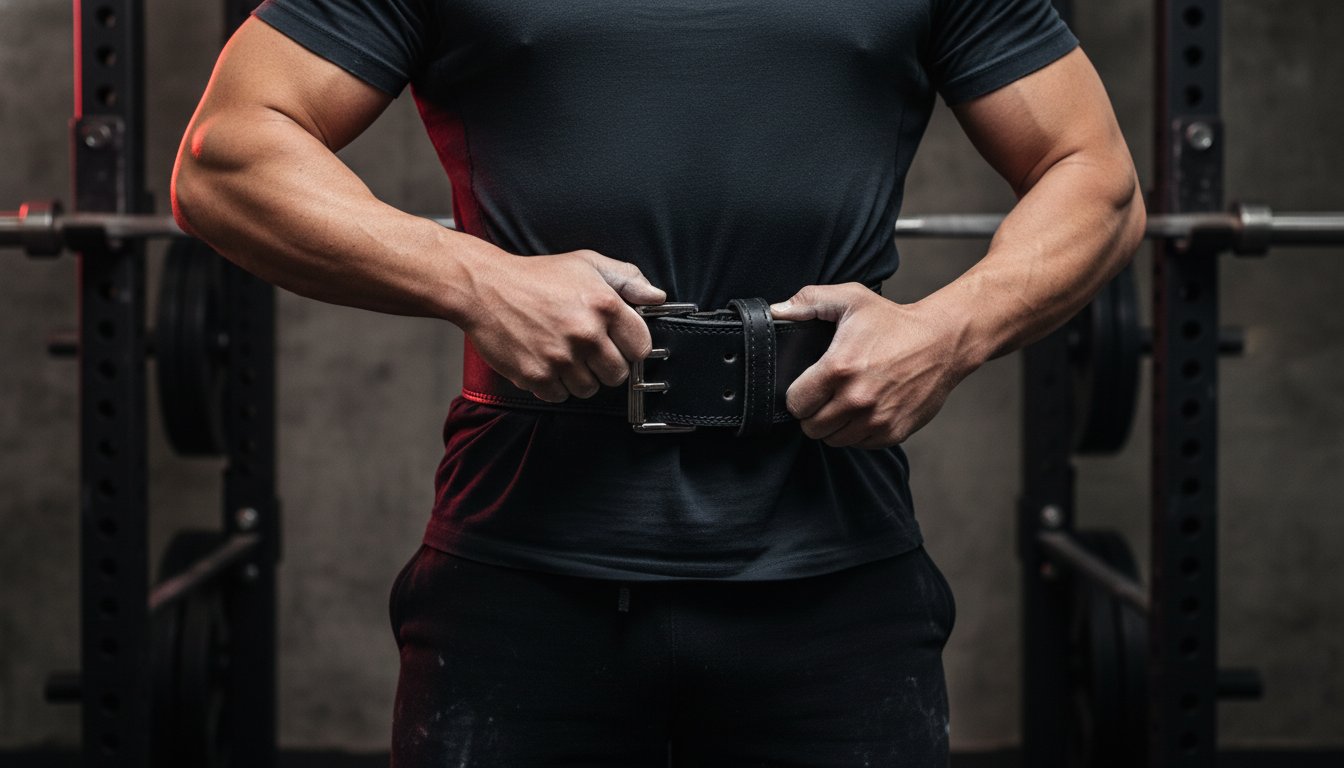
A lever lifting belt is a professional-grade strength tool built for maximum rigidity. It serves as the primary choice for competitive powerlifters and strongmen because it offers a level of security that velcro or prong belts cannot match. The core difference lies in the mechanical advantage of the lever. Instead of pulling a strap through a buckle, you use a heavy-duty metal clasp to lock the belt into a fixed position. This creates a solid, unchanging "canister" for the spine and core. Learning how to use a lever lifting belt correctly ensures you maximize this structural support during heavy compound movements.
Lever vs. Prong Belts: Which is Right for You?
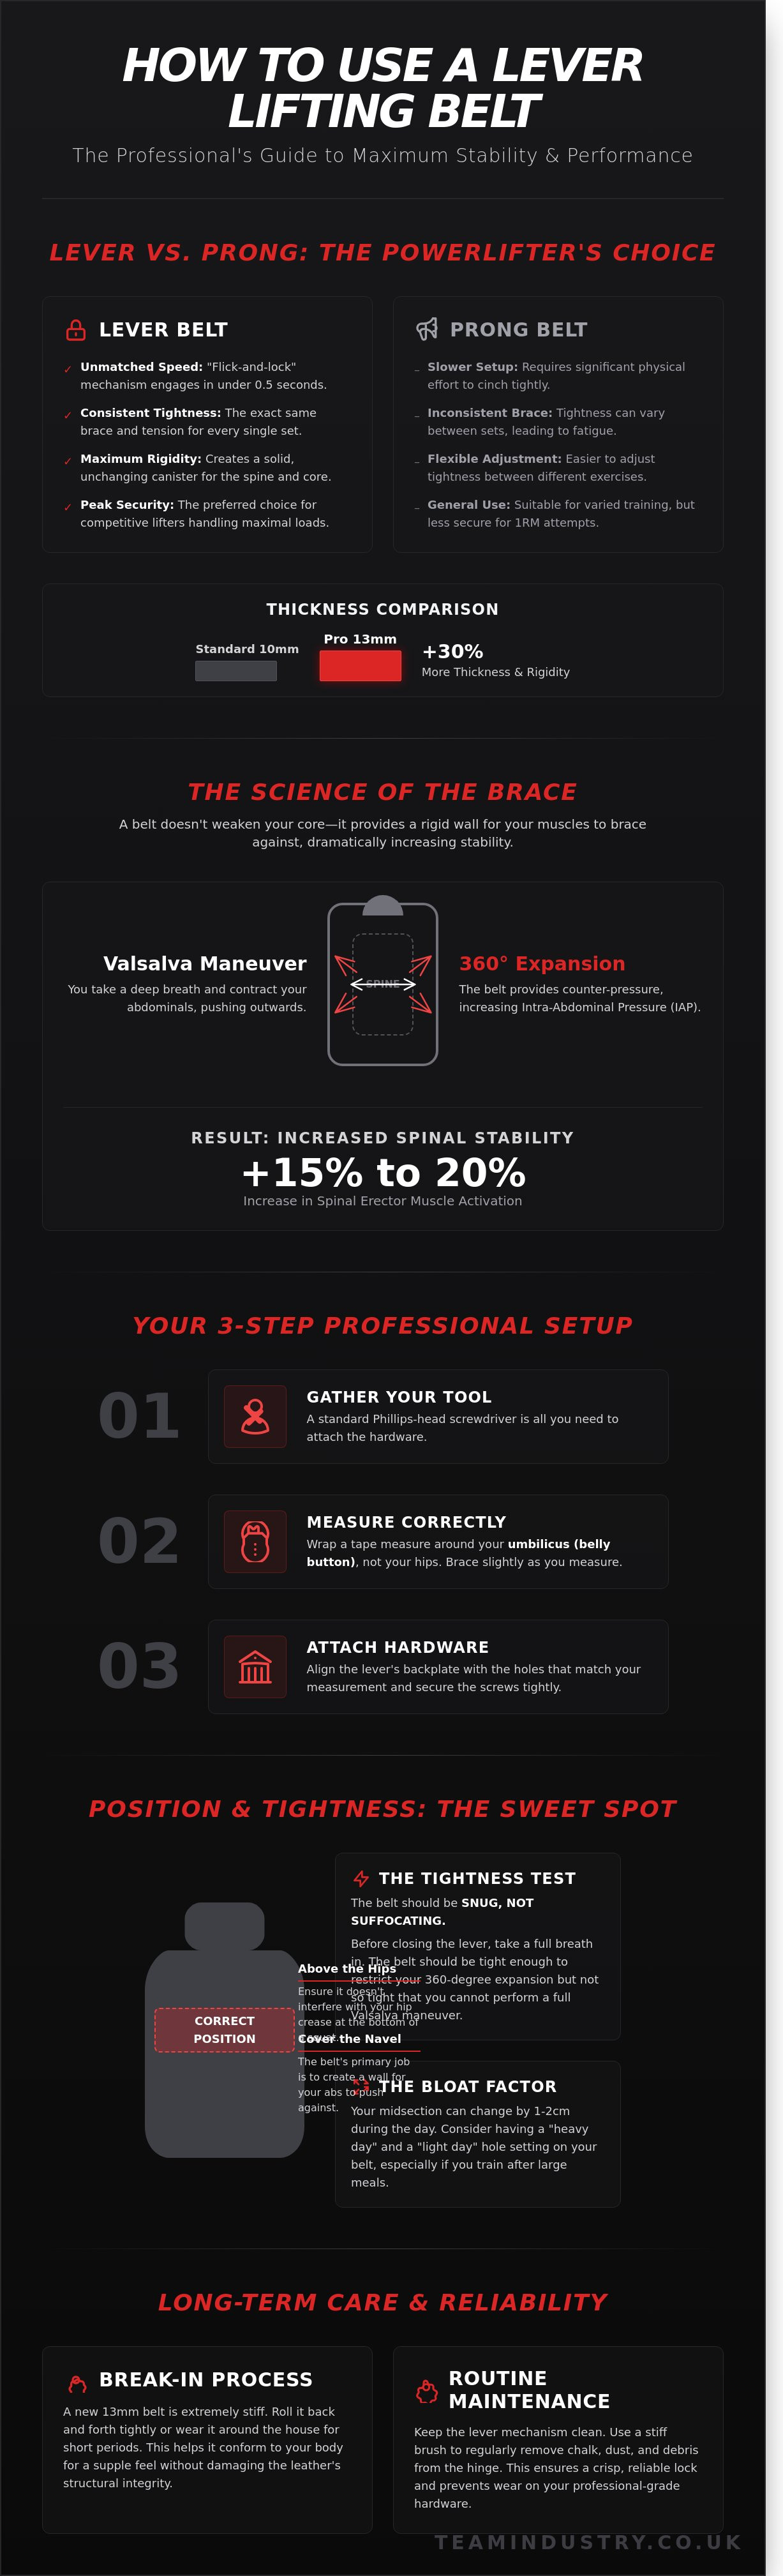
The "flick-and-lock" mechanism defines the lever belt experience. It allows you to engage the belt in under 0.5 seconds, providing a consistent level of tightness every single time you step onto the platform. Manual prong belts require significant physical effort to cinch, which can lead to fatigue or inconsistent bracing between sets. Most professional lever belts are available in 10mm or 13mm thicknesses. A 13mm belt offers roughly 30% more thickness than a standard 10mm version, providing the extreme stiffness required for 300kg+ deadlifts. While prong belts allow for quick adjustments between different exercises, the lever belt is the superior choice for dedicated heavy sessions. If you need a reliable foundation, explore our range of weight lifting belts designed for industrial-strength performance.
The Science of Intra-Abdominal Pressure (IAP)
A common misconception is that a belt does the work for you. In reality, Understanding the Lever Lifting Belt requires a look at Intra-Abdominal Pressure (IAP). The belt acts as a physical wall for your abdominals to push against. When you perform a Valsalva maneuver, the internal pressure stabilizes your spine from the inside out. Research indicates that wearing a rigid belt can increase muscle activation in the spinal erectors by 15% to 20% compared to lifting beltless. It doesn't weaken your core; it provides a tactile cue that allows you to contract your muscles harder. This consistent tension is essential for maintaining spinal integrity when handling loads over 85% of your maximum capacity. Team Industry recommends using a lever belt to ensure your bracing remains 100% reliable across every rep.
The First-Time Setup: Assembling and Adjusting Your Lever Belt Hardware
Setting up your hardware correctly is the foundation of safety and performance. Most professional lever belts arrive with the buckle detached to allow for a bespoke fit. To begin, you will need a standard Phillips-head screwdriver. This is the most vital accessory in your gym bag during the initial setup phase. Unlike a prong belt that you adjust on the fly, a lever belt relies on a fixed position that must be calibrated to your specific midsection circumference. Taking ten minutes to get this right ensures the belt remains a reliable partner during your heaviest sets.
This attention to detail extends beyond just your primary equipment. Ensuring you have all your gym bag essentials, from specialized tools to general consumer goods, can make a big difference in your training focus. For those interested in exploring a broad range of products, you can learn more about SUZANA SHOP.
Measuring Your Waist for the Perfect Fit
Trouser size is irrelevant when determining how to use a lever lifting belt effectively. Jeans sit on the hips, but a lifting belt must sit higher, encircling the abdominal wall. Use a flexible tape measure at the level of your umbilicus, commonly known as the belly button. This positioning is critical because the belt's primary job is to create a wall for your abs to push against.
Take this measurement while wearing your preferred mens gym clothes. Fabric thickness from hoodies or oversized tees can add 1cm to 2cm to your waistline, which might necessitate moving the lever plate by one hole. Ensure you brace your core slightly while measuring. This mimics the physical state of a lifter during a squat or deadlift. The biomechanical necessity of this tension is explored in The Weight Belt Controversy, which details how external support facilitates intra-abdominal pressure to protect the spine.
Attaching the Lever Plate and Teeth
Once you have your measurement, align the lever's backplate with the pre-drilled holes in the leather. Most 10mm or 13mm belts feature a double-row hole system for maximum stability. Insert the screws through the plate and into the lever mechanism on the opposite side. Tighten them until there is zero movement between the metal and the leather. A loose plate can lead to shifting mid-lift, which compromises your stability.
Apply the "two-finger" rule to verify the tension. When the lever is locked shut, you should be able to slide two fingers between the belt and your stomach with effort. If you can't fit your fingers, the belt is too tight and will restrict your ability to take a full diaphragmatic breath. If it's too loose, you won't feel the resistance needed to brace. Mastering how to use a lever lifting belt requires finding this sweet spot where the belt feels like a second skin. If your current equipment feels imprecise or lacks the necessary durability, upgrading to a high-specification Team Industry lever belt provides the professional-grade security required for heavy compound movements.
Finding the Perfect Fit: Position, Tightness, and the Bloat Factor
Learning how to use a lever lifting belt effectively starts with finding your specific "sweet spot." This isn't a universal measurement. It depends entirely on your torso length and hip structure. Most lifters find success by positioning the belt approximately 2cm to 5cm above the iliac crest. This placement ensures the belt sits firmly against the small of the back while providing a solid wall for the abdominal muscles to push against.
High vs. Low Placement: Customising for Your Lift
Positioning often changes based on the movement you're performing. For the squat, a lower, level placement is standard. It provides maximum support for the lumbar spine during the descent. However, deadlifts often require a different approach. Many Team Industry athletes prefer a "high-belt" position or a slight upward tilt. This prevents the thick leather from digging into the hip crease or catching on the thighs during the initial pull from the floor. If you feel the belt shifting as you reach for the bar, try raising it by one finger-width.
The Ideal Level of Compression
The belt should feel snug but breathable before you flick the lever shut. You need sufficient internal space to draw a deep diaphragmatic breath. According to a U.S. Army study on lifting mechanics, the belt's effectiveness relies on increasing intra-abdominal pressure. If the lever is too tight, you cannot expand your stomach into the belt, which actually reduces your stability.
Follow these practical indicators to determine if your weight lifting belts are adjusted correctly:
- The Squat: Aim for a tight fit that still allows a full 360-degree breath.
- The Deadlift: Consider a slightly looser setting. This helps you achieve a neutral spine in the starting position without the belt restricting your air intake.
- The Overhead Press: Keep the belt high enough to support the mid-back but loose enough to allow the ribcage to expand.
Be aware of the "gym bloat" factor. Bodyweight fluctuations of just 1kg to 2kg, often caused by hydration levels or salt intake, can change how the lever sits. If you notice bruised ribs or find your breathing restricted before the lift even starts, it's time to use a screwdriver to move the lever plate. Don't force a lift in a belt that's too tight. Proper bracing requires a balance of external resistance and internal expansion to keep your spine safe and your lifts heavy.
Mastering the Brace: How to Breathe and Move with a Lever Belt
Learning how to use a lever lifting belt effectively requires more than just cinching it tight. The belt serves as a rigid wall for your core to push against. This creates intra-abdominal pressure (IAP), which stabilizes the spine during heavy loads. A 2014 study published in the Journal of Strength and Conditioning Research found that wearing a belt can increase IAP by up to 15% during squats. Mastering how to use a lever lifting belt means focusing on this internal pressure before you start the movement.
The Valsalva Manoeuvre Step-by-Step
The Valsalva manoeuvre is the engine behind every belted lift. It involves exhaling against a closed airway to create a pressurised cylinder in your midsection. Follow these steps to get it right:
- Take a belly breath: Inhale deeply into your stomach, not your chest. You should feel your waist expand.
- Create 360-degree expansion: Don't just push your belly forward. Push your obliques out to the sides and your lower back into the rear of the belt.
- Hold the pressure: Tighten your core muscles as if you're about to take a punch. Keep this hold until you're past the sticking point of the rep.
Many lifters make the mistake of pulling their stomach in to tighten the belt. This is a safety risk that reduces stability. You want to fill the space between your body and the leather entirely. If you can still slide a hand between your side and the belt while braced, it's likely too loose.
Training with the Belt Across Different Lifts
Timing your brace is a critical part of your setup routine. Don't engage the lever too early if it restricts your ability to take a full breath. Most lifters find success by taking their air first, then locking the lever to trap that pressure inside. This creates a rock-solid foundation for the descent.
Your technique should adapt depending on the movement. In the bench press, a belt provides a tactile cue to stay tight and helps maintain a solid arch. For the overhead press, it prevents excessive lower back arching when the weight is at its highest point. Team Industry recommends training without a belt for warm-up sets under 70% of your max. This ensures your natural bracing remains strong while saving the belt for your top-tier working sets.
Our bespoke designs are built for safety and performance in the most demanding environments. Secure your lifting foundation with our trusted weight lifting belts and start training with confidence today.
Long-Term Care and Reliability: Maintaining Your Team Industry Strength Gear
A professional 13mm lever belt is a piece of precision engineering designed to last for over 10 years of consistent training. To get the most out of your kit, you must treat it with the same respect as any other high-performance tool. Understanding how to use a lever lifting belt effectively involves more than just clicking the buckle; it requires a proactive approach to maintenance and leather care to ensure the gear remains a dependable partner during every heavy session.
Breaking in Stiff Professional Leather
New 13mm grade-A leather is notoriously rigid upon arrival. To accelerate the break-in process, use the rolling technique. Spend 5 minutes before each of your first 4 sessions gently rolling the belt into a tight circle, alternating between rolling it inward and outward. This action softens the surface fibers without compromising the structural core that provides your support. You should expect minor bruising or skin irritation during the initial 3 to 5 heavy sessions. This is a standard part of the process as the leather begins to mould to your specific rib and hip anatomy. Consistent use is the only way to achieve that bespoke, comfortable fit that professional lifters rely on.
Troubleshooting Lever Tension and Screws
Heavy lifting creates immense internal pressure that can strain hardware over time. If you find the lever pops open during a lift, check the teeth alignment and the hinge for any trapped gym chalk or debris. You should perform a hardware check every 30 days to ensure the screws remain flush against the backing plate. Choosing a weight lifting belt with heavy-duty steel components ensures that the mechanism can withstand the 200kg+ loads common in competitive powerlifting. If you notice any play in the buckle after 2 years of heavy use, consider a drop of thread-locker on the screws to secure them permanently.
- Cleaning: Wipe the interior leather with a damp cloth every 14 days to remove salt deposits from sweat.
- Storage: Avoid leaving your belt in a hot car or a damp gym bag. Store it flat or loosely coiled in a dry, room-temperature environment to prevent the leather from cracking or warping.
- Inspection: Every 6 months, inspect the lever hinge for smooth operation. A single drop of 3-in-1 oil can keep the mechanism snapping shut with authority.
A Team Industry Lever Belt represents a serious investment in your lifting career. By following these maintenance steps, you ensure your gear provides the same level of 24/7 reliability and safety that our brand stands for. Mastering how to use a lever lifting belt means taking ownership of your equipment so it never fails you when you are under the bar.
Elevate Your Performance on the Platform
Mastering how to use a lever lifting belt is a fundamental skill for any serious athlete. You now understand that a successful lift starts with a precise setup of your 13mm hardware and a calculated approach to the 1-inch bloat factor during heavy sets. By focusing on your bracing technique and maintaining your gear, you ensure every training session remains both safe and productive. Consistency in your setup leads to consistency in your results.
At Team Industry, we provide the specific tools you need to excel. Our belts feature professional-grade 13mm leather and a heavy-duty steel lever mechanism designed to withstand the intense pressure of a 300kg deadlift. We're proud to be a trusted choice for UK powerlifters and strongmen who demand absolute reliability in every rep. This gear is built to be a dependable partner in your strength journey, helping you maintain the high standards required for elite performance.
Shop the Team Industry Heavy Duty Lever Belt Collection and join a team dedicated to operational excellence. Keep training hard and stay focused on your goals.
Frequently Asked Questions
How tight should a lever belt be for squats vs deadlifts?
For squats, you want the belt tight enough that you can only fit 2 fingers between your stomach and the leather. For deadlifts, many lifters move the belt 1 notch looser to allow for a better starting position and deeper breath. Learning how to use a lever lifting belt effectively means understanding these 12mm adjustments to maximize intra-abdominal pressure without restricting your movement.
Can I use a lever belt for every exercise in the gym?
No, you should save the lever belt for heavy compound movements like squats, deadlifts, and overhead presses. Using a belt for 100% of your workout can limit core muscle engagement during accessory work. Reserve it for sets exceeding 80% of your 1-rep max to ensure you're building natural stability alongside mechanical support.
Do I need a screwdriver to adjust my lever belt every time?
You only need a screwdriver when your body weight or clothing thickness changes. Once the lever is bolted into the correct holes, you simply flip the latch to lock it. If you find yourself adjusting the screws more than 1 time per month, consider the Team Industry Quick-Release Lever which allows for faster transitions without tools.
What happens if my weight changes? Is the lever belt still useful?
The belt remains useful as long as your waist measurement stays within the 15cm range covered by the pre-drilled holes. If you lose or gain more than 5kg, you'll likely need to use a Phillips head screwdriver to move the lever plate. This process takes approximately 90 seconds and restores the perfect fit for your new physique.
Is a 10mm or 13mm lever belt better for a beginner?
A 10mm lever belt is generally the better choice for 90% of beginners. It provides substantial support while remaining flexible enough to break in within 21 days. A 13mm belt is much stiffer and often causes more discomfort for those not used to the pressure, making the 10mm Team Industry Professional Belt the ideal entry point for new lifters.
Why does my lever belt cause bruising on my hips or ribs?
Bruising usually occurs because the belt is positioned incorrectly or the leather is still in the 14-day break-in period. Ensure the 4-inch width is centered between your ribs and hip bones. If the bruising persists after 10 heavy sessions, try wearing a thicker cotton t-shirt to provide a layer of padding against the 100% genuine leather edges.
Can I use a lever belt in a powerlifting competition?
You can use a lever belt in competition provided it meets the federation's specific technical requirements. Most organizations, like the IPF, require the belt to be no more than 10cm wide and 13mm thick. Team Industry belts are manufactured to these exact 2024 specifications, ensuring you won't face disqualification during the equipment check at your next meet. The official nature of these events also requires clear identification for staff and judges, a service provided by specialists such as Imagin Products Ltd.
How do I know if the lever is facing the right way when I assemble it?
The lever handle should always point toward your dominant hand and fold across your body to close. When learning how to use a lever lifting belt, ensure the buckle sits on the outside of the leather strap. If the Team Industry logo is upright and the metal teeth catch the holes securely, you've assembled the mechanism correctly for a safe lift.
Share:
Wrist Strap: The Ultimate Guide to Lifting Straps and Joint Support
Mastering the Barbell Deadlift: The Ultimate Form and Technique Guide