

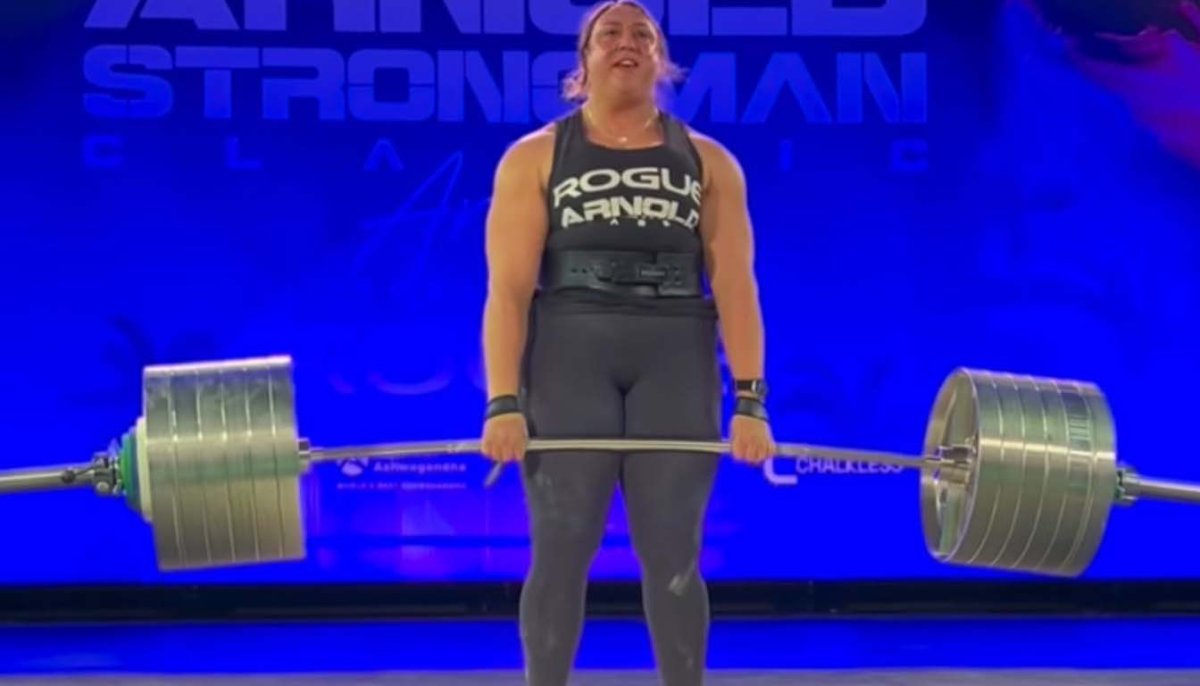
Did you know that strength training has officially become the top fitness goal for adults in 2026, even surpassing weight loss? As more lifters prioritize functional power, the barbell deadlift remains the ultimate test of total body strength. However, many athletes struggle with persistent lower back soreness or find their grip failing long before their legs give out. You deserve to move heavy weight without the nagging fear of injury or the confusion caused by conflicting setup advice.
We understand that technical precision is the difference between a failed attempt and a new personal record. This guide provides the exact cues and gear requirements you need to execute a safe, powerful barbell deadlift every time you step onto the platform. We'll cover the 2026 IPF rule updates regarding lockout standards and explain how a Team Industry Lifting Belt can provide the stability necessary for high-intensity sets. From mastering the "push the floor away" cue to selecting the right Figure 8 Lifting Straps, you're about to gain the confidence to dominate your training sessions.
Key Takeaways
- Master the technical setup for the barbell deadlift by positioning the bar over your mid-foot and engaging your lats to create a rigid, powerful pull.
- Protect your lower back by implementing proper bracing techniques to avoid common errors like lumbar rounding and premature hip rise.
- Identify the primary movers in the posterior chain to ensure you are recruiting the glutes and hamstrings for maximum force production.
- Learn how to utilize professional gear such as a Team Industry Lifting Belt and Liquid Chalk to enhance stability and solve grip issues.
What is the Barbell Deadlift and Why is it the King of Lifts?
The barbell deadlift is the most fundamental test of raw human strength. Unlike other compound movements that start with a descent, this lift requires you to pull a stationary weight from a dead stop against pure gravity. It serves as a core pillar in powerlifting and strongman competitions because it recruits almost every major muscle group in the body. If you want to measure your total physical capacity, this is the movement that provides the most honest answer.
Performing this lift primarily targets the posterior chain, including the glutes, hamstrings, and the erector spinae. Beyond building muscle, the functional benefits are extensive. Regular training improves bone density, enhances posture, and develops the explosive power needed for high-level athletics. For a deeper look at its origins and mechanics, you can explore the technical details of What is the Barbell Deadlift online.
To better understand the basic mechanics of this foundational lift, watch this helpful video:
The Anatomy of a Heavy Pull
A heavy deadlift is more than just a leg exercise. Your traps and lats must engage heavily to provide upper back stability and keep the bar path tight to your shins. Your core acts as a rigid cylinder, creating the internal pressure necessary to protect your spine. This stabilization ensures that the force generated by your legs isn't lost through a soft midsection. Many lifters find that using all industry strength gear helps them maintain this rigidity during maximal effort attempts.
Conventional vs. Other Variations
While variations like the sumo deadlift or Romanian deadlift have their place, they shift the focus to different muscle groups or ranges of motion. The sumo style uses a wide stance to shorten the pull distance, while the Romanian version emphasizes the hip hinge to isolate the hamstrings. Despite these options, the conventional barbell deadlift is the gold standard for general strength development and overall physical resilience.
How to Barbell Deadlift with Perfect Form: A Step-by-Step Guide
Executing a heavy barbell deadlift requires more than just raw effort; it demands technical discipline. Start by positioning your feet hip-width apart with the bar cutting directly across your mid-foot. When you look down, the bar should be about an inch from your shins. Grip the bar just outside your legs using a double overhand or hook grip. To engage your lats, imagine "breaking the bar" across your shins. This creates a rigid upper body that prevents the bar from drifting forward during the ascent.
The "wedge" is the most critical phase for strength athletes. Pull your chest up and drop your hips until you feel immense tension in your hamstrings and glutes. You aren't just sitting down; you're anchoring yourself to the weight. For detailed anatomical cues on this setup, refer to the NASM guide on How to Barbell Deadlift with Perfect Form. Once you are tight, don't "pull" with your arms. Instead, drive your feet into the floor as if you're trying to push the earth away from you.
Setting the Back and Pulling the Slack
Before the plates leave the floor, you must "pull the slack" out of the bar. Apply upward pressure until you hear the barbell click against the top of the plate holes. This pre-tensioning ensures your spine stays neutral and prevents a sudden jerk that often leads to lower back rounding. Maintain a neutral gaze about six feet in front of you to keep your neck aligned with your spine throughout the entire range of motion.
The Lockout and Descent
Finish the lift by driving your hips forward and squeezing your glutes. Per the 2026 IPF standards, you must ensure a full knee lockout and a steady upright position without overextending your lumbar spine. To return the weight, hinge at the hips first. Once the bar clears your knees, drop it straight down in a controlled manner. If you find your core stability wavering during these heavy phases, a 10mm Lever Belt can provide the necessary intra-abdominal pressure to keep your form secure.
Avoiding Common Deadlift Mistakes to Protect Your Lower Back
Technical breakdown is the primary cause of injury when performing the barbell deadlift. Many lifters experience lumbar rounding because they fail to stabilize their spine before the weight moves. This happens when loads are too heavy or setups are rushed. Focus on Avoiding Common Deadlift Mistakes by ensuring your spine remains neutral from the floor to the lockout. If your grip starts to slip, your focus shifts away from form; using Team Industry accessories like liquid chalk keeps your hands secure so you can concentrate on your mechanics.
The "stripper pull" is another frequent error where the hips rise faster than the chest. This mechanical failure shifts the entire load onto the lower back and eliminates the advantage of leg drive. You can fix this by maintaining a consistent back angle until the bar passes your knees. Keep the barbell in constant contact with your legs throughout the pull. Any gap between the bar and your shins increases the moment arm; this makes the weight feel significantly heavier and puts unnecessary stress on your vertebrae.
Proper Bracing and the Valsalva Manoeuvre
Effective bracing requires more than just tightening your gut. Take a deep breath into your belly, not your chest, and hold it while bracing your abdominal wall. This creates a pressurized cylinder of air that supports your spine from the inside. A professional lifting belt provides a rigid surface for your abs to push against, which significantly increases this internal pressure. This synergy between breath and equipment is vital for safely handling near-maximal loads during a heavy barbell deadlift.
Managing Fatigue and Rep Quality
Ego lifting often leads to "touch-and-go" repetitions that bounce off the floor. This momentum masks technical flaws and increases the risk of a snap-back injury as fatigue sets in. Reset your stance and breath between every single rep. This discipline ensures that your first rep looks identical to your last. If you're ready to upgrade your safety standards, explore our range of Lever Belts designed for maximum support.
Essential Gear for Heavy Deadlifting: Belts, Straps, and Chalk
While technical discipline is the foundation of a safe barbell deadlift, professional equipment allows you to push your limits with greater stability. A lifting belt is the most significant tool for any strength athlete. It acts as a rigid wall for your abdominal muscles to push against. This increases intra-abdominal pressure and protects your spine during maximal effort pulls. For serious lifters, Team Industry Strength Gear has become a dependable standard for high-performance training.
Grip strength is often the first point of failure. You can manage this by choosing between liquid chalk and lifting straps. Chalk increases friction by removing moisture, which is ideal for maintaining a raw grip during competition-style reps. However, when your training volume exceeds what your hands can hold, straps ensure your hamstrings and glutes remain the focus. Your footwear choice also impacts force production. Avoid cushioned running trainers; their soft soles absorb energy and create instability. Use flat, hard-soled shoes to maintain a direct connection with the floor.
Lasso vs. Figure 8 Straps for Deadlifting
Standard lasso straps offer versatility for various pulling movements, but Figure 8 straps provide the highest level of security. The double-loop design essentially locks your hands to the bar. This allows you to focus entirely on the pull without worrying about the barbell rolling out of your palms. It's best to transition to straps when grip fatigue begins to compromise your central nervous system or your technical execution.
The Importance of Joint Support
Joint health is a priority for long-term progress. Using Heavy Duty Knee Sleeves provides the warmth and proprioception necessary to keep your joints tracking correctly under load. These aren't just for squats; they offer stability during the initial leg drive of a heavy pull. Additionally, wrist wraps help maintain a rigid hand position. This prevents minor deviations that can lead to wrist discomfort during high-volume sessions. Proper support ensures you stay on the platform and continue building strength safely.
Take Your Strength to the Next Level
Mastering the barbell deadlift is a journey of technical refinement and consistent effort. You've learned that success on the platform depends on a precise mid-foot setup, pulling the slack out of the bar, and maintaining a rigid core through the Valsalva manoeuvre. These fundamentals don't just increase your numbers; they ensure you remain injury-free for years of productive training. Consistency is your greatest asset, so treat every warm-up rep with the same focus as a new personal record.
Reliability is essential when you're moving heavy weight in a high-intensity environment. Team Industry gear is engineered for maximum durability and is currently used by top UK Strongman and Powerlifting athletes. We offer professional-grade 13mm and 10mm lever belts designed to provide the specific level of support your training demands. When your equipment matches your work ethic, plateaus don't stand a chance.
Upgrade your lifting setup with Team Industry Professional Gear to experience the difference that quality makes. Step onto the platform with the quiet confidence of a specialist. We're proud to support your pursuit of operational excellence in the gym. Keep pulling, stay disciplined, and watch your strength reach new heights.
Frequently Asked Questions
Is the barbell deadlift bad for your lower back?
The barbell deadlift is not inherently bad for your lower back; it's a tool for building spinal resilience when performed with disciplined technique. Most injuries result from mechanical failure. Lumbar rounding is a common culprit. By prioritizing a neutral spine and proper bracing, you strengthen the muscles that protect your vertebrae. Always ensure your setup is consistent before you attempt to increase the load on the bar.
Should I use a lifting belt for every deadlift set?
You don't need to use a lifting belt for every set, particularly during your initial warm-ups. It's more effective to save your Team Industry Lifting Belt for high-intensity working sets. This strategy helps you develop natural intra-abdominal pressure at lower weights. It provides maximum stability when the load becomes most demanding on your central nervous system. Use your gear as a tool, not a crutch.
What is the difference between a conventional and a sumo deadlift?
Stance width and muscle recruitment are the main factors that distinguish these two styles. A conventional pull uses a narrow stance. This emphasizes the hamstrings and lower back. Conversely, the sumo style utilizes a wide stance with the hands inside the knees. This shifts more load to the quads and glutes. Your hip structure and limb proportions usually dictate which variation allows for the most power.
How often should I deadlift to see strength gains?
Training the barbell deadlift once or twice per week is the most effective frequency for most strength athletes. Heavy pulls are neurologically demanding. Daily sessions often lead to fatigue that stalls progress. Many successful programs in 2026 utilize one high-intensity day for heavy triples or singles and a second session for lighter volume. This approach respects your recovery needs while ensuring consistent skill development.
Can I deadlift in running shoes?
Avoid deadlifting in running shoes because their foam soles create an unstable platform that bleeds power. This compression makes it difficult to maintain balance. It can shift your weight too far forward during the pull. Use flat, thin-soled shoes to keep your center of gravity close to the floor. If you're pushing for a new PR, using Liquid Chalk can further enhance your stability by securing your grip.
Share:
Do I Need Lifting Straps for Rack Pulls? Maximising Overload Without Grip Failure
Liquid Chalk vs Block Chalk: The Lifter’s Guide to Maximum Grip in 2026