

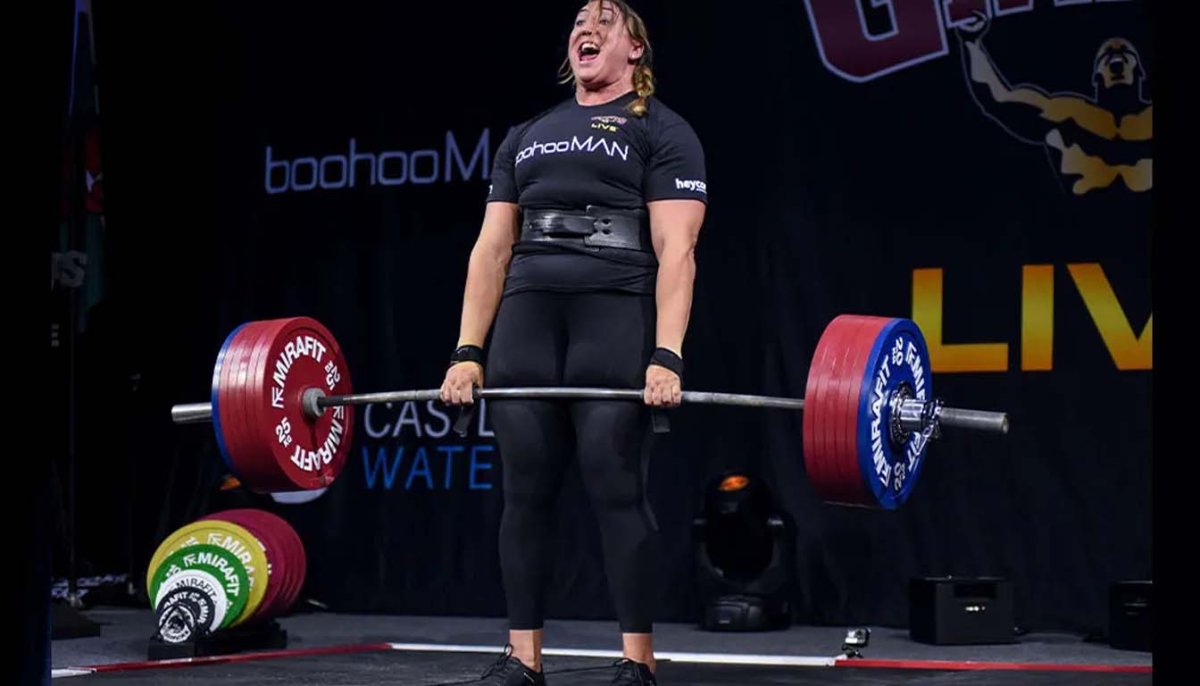
A safer deadlift starts before you touch the bar. A repeatable deadlift setup checklist for safety helps you check your space, equipment and starting position before the first rep, rather than trying to remember every cue under load. If you’re unsure whether the plates are secure, the floor is clear or your position is ready, pause and work through the checks.
This checklist covers the practical steps to take before each set: inspect the bar and plates, clear your lifting area, and establish a starting position that suits your build and deadlift style.
Work through the checks in order: prepare your space, confirm your equipment is ready, set your stance and grip, then brace and prepare to lift. Use the same sequence each time, adjusting your position as needed while keeping the bar close and your setup controlled.
Key Takeaways
- Check that the lifting area is stable, dry, clear and spacious enough for your planned lift.
- Use the deadlift setup checklist for safety to build a consistent position, adapting your stance and grip to your body and lifting style.
- Watch for rushed setup, uneven plate loading and a bar positioned too far away, all of which can disrupt a controlled start.
- Separate the checks you make once per session from the positioning and equipment checks you repeat before each set.
Deadlift safety starts before the lift: check your space and setup
A short pre-lift routine makes preparation more consistent, but no checklist can guarantee injury prevention. A deadlift setup checklist for safety is a repeatable set of checks, from clearing the floor to confirming the bar is ready.
Start with the platform. Make sure it’s stable, dry, clear and large enough for your planned lift. Check that you have a clear route to the bar and enough room to complete the movement. For an overview of deadlift technique and safety, see the different styles and considerations involved.
For a visual look at setting up, watch this deadlift guide:
Clear the lifting area before loading the bar
Move loose plates, bags, cables and other obstructions away from the lifting area. Make sure you can approach the bar, set your feet and complete the lift without equipment or people crowding your path. If the floor is wet or unstable, pause and address it before loading.
Inspect the bar and plates
Look over the bar and plates for visible damage, then load suitable plates evenly on both sides. Check that each plate is seated securely. Use collars where appropriate for your bar, plates and setup, and fit them correctly. If you change plates between sets, recheck the load before lifting.
These checks don’t replace sound lifting technique. They help you start with an orderly space and properly arranged equipment, leaving you ready to focus on your position and lifting cues.
Deadlift setup checklist: position your feet, hands and body
Use the same sequence before each pull, then adjust it to your build, the bar and your chosen style. A useful deadlift setup checklist for safety makes preparation consistent, but no single cue or position suits every lifter or removes all risk. A CDC-hosted paper discussing deadlift biomechanics and injury prevention offers further context on the demands of heavy lifting.
- Approach: Walk up to the bar with control and set your feet in your intended stance.
- Find your position: For a conventional pull, the bar commonly starts over the middle of your feet. For sumo, set your feet wider to suit your range of motion and the bar path.
- Hinge and reach: Push your hips back, bend your knees as needed, and take hold of the bar. Keep it close to your body.
- Set your grip: Place your hands where they won’t obstruct your legs. Choose a grip you can hold securely.
- Brace and create tension: Take a controlled breath, brace your trunk and gradually take the slack out of the bar before lifting.
- Check your start: Set your back in a controlled position. Where your style allows, keep your shoulders slightly ahead of the bar, then prepare to push through the floor.
Set your stance and grip with control
Choose a stable stance that lets the bar travel close without your arms or legs getting in the way. Hip width can be a starting point for conventional deadlifts, while sumo uses a wider stance. Adjust for your anatomy and bar type. With an overhand grip, both palms face you; with a mixed grip, one palm faces away. Neither grip is right for everyone.
Brace and create tension before the first rep
Keep the setup deliberate. Brace before the pull and build tension gradually rather than jerking the bar from the floor. Use a consistent sequence: approach, position, grip, brace, take tension, then lift with control. Optional lifting straps can be part of your equipment choices, but they don’t replace a sound setup or secure technique.
Avoid common deadlift setup mistakes without chasing perfect form
Deadlift cues are guides, not fixed rules for every body. Stance width, grip and starting position can vary with your build, comfort, bar type and whether you pull conventional or sumo. Use a deadlift setup checklist for safety to make preparation repeatable, then refine the details that help you lift with control.
Which deadlift cues are individual rather than universal?
A cue such as “keep your back flat” shouldn’t mean forcing yourself into one identical posture. Aim for a controlled, braced position you can maintain through the lift. Choose a stance and grip that suit your variation and let the bar travel close. If you’re unsure whether your setup is consistent, a qualified strength coach can provide personalised technique feedback.
Rushing can lead to a missed grip adjustment or an unbraced start. Unevenly loaded plates can change how the bar feels, while starting too far away can make it harder to keep the bar close as you pull. Pause to check your position and the load, then begin only when your setup feels controlled. Belts and straps are optional equipment, not replacements for sound technique or coaching. Explore weight lifting belts as one equipment option.
When should you reset or stop a set?
Reset before the pull if the bar moves, your setup changes unexpectedly or you can’t maintain control. Set the bar down if control falters during a rep. Don’t try to push through sharp or worsening pain; stop the set and seek appropriate professional guidance. Reducing the load may be sensible if you can’t keep a controlled position with the weight you’ve chosen.
Resetting isn’t a failed rep. It gives you a chance to restore your position and decide deliberately whether to continue.
Turn the deadlift checklist into a repeatable pre-set routine
A routine works best when you separate checks you make once from those you repeat. Before your session, check the lifting area and equipment. Before each warm-up and working set, confirm your position and prepare for the first rep. This keeps the deadlift setup checklist for safety practical without turning it into a long ritual.
A quick checklist to run before each set
- Once per session: Make sure the lifting area is clear and the floor is stable and dry. Inspect the bar, plates and collars, and check that the load is arranged evenly.
- Before each set: Confirm the bar is ready and your stance suits your chosen style. Set your grip, hinge into position and brace.
- Before the first rep: Take tension gradually. If you notice a missed check or your position feels off, pause and reset rather than rushing into the pull.
Use the same steps for warm-up sets, even when the load feels light. That familiar sequence can then carry into your working sets. Adjust the load or your setup when needed.
Where lifting accessories fit into preparation
Accessories are optional tools, not requirements or safety guarantees. Lifting straps for strength training may suit lifters who choose extra grip assistance, while weight lifting belts can be part of an individual bracing approach. Choose based on your needs and lifting practice. Neither replaces appropriate loading, controlled technique or a clear lifting area.
Keep the routine simple: check the space and equipment, set your position, brace, then begin under control. If a check doesn’t feel right, stop and reset before the next rep.
Make your next deadlift set more consistent
A dependable deadlift setup checklist for safety starts with the space and equipment, then moves through your stance, grip, brace and controlled first pull. Check the lifting area and bar before your session, then repeat your positioning checks before each set. If something feels off, pause and reset rather than rushing.
There’s no single stance or grip that suits every lifter. Build a repeatable setup around your body and deadlift style, and treat accessories as optional tools, not replacements for appropriate loading or sound technique. If you choose to use them, browse lifting straps or weight lifting belts. Team Industry supports strength-sport federations and events.
For equipment to complement your training, explore Team Industry strength-training accessories. Choose the equipment that fits your training, keep your checks consistent and approach every rep with control.
Frequently Asked Questions
What should I check before deadlifting?
Check your space, equipment and starting position. Make sure the floor is stable, dry and clear, with enough room to lift. Inspect the bar and plates, confirm the load is even and secure, then set your stance and grip. Use this deadlift setup checklist for safety before warm-up and working sets. Pause to reset if anything feels out of place.
Should the bar touch my shins when I deadlift?
The bar should stay close to your body, but it doesn’t need to press hard into your shins. Set it over the middle of your feet, then move into position so your shins are close to the bar. Light contact may happen depending on your body proportions and deadlift style. Keep the bar path controlled and avoid letting it drift forwards as you begin the pull.
Are deadlifts safe for beginners?
Deadlifts can be part of a beginner’s strength training when the load and technique suit their experience. Start with a manageable weight, practise a controlled hip hinge and learn to brace before increasing the load. Progress gradually, and stop if you experience sharp or worsening pain or can’t maintain control. If you’re unsure about your technique, seek feedback from a qualified strength coach.
Should I wear a belt or lifting straps for deadlifts?
A belt or straps are optional, not essential for every lifter. A belt may be useful as part of your bracing approach, while straps can assist grip when appropriate. Neither replaces suitable loading, sound technique or a clear lifting area. If you choose to use them, browse weight lifting belts and lifting straps.
Share:
Advanced Knee Wrap Techniques: A Practical Squatting Guide