
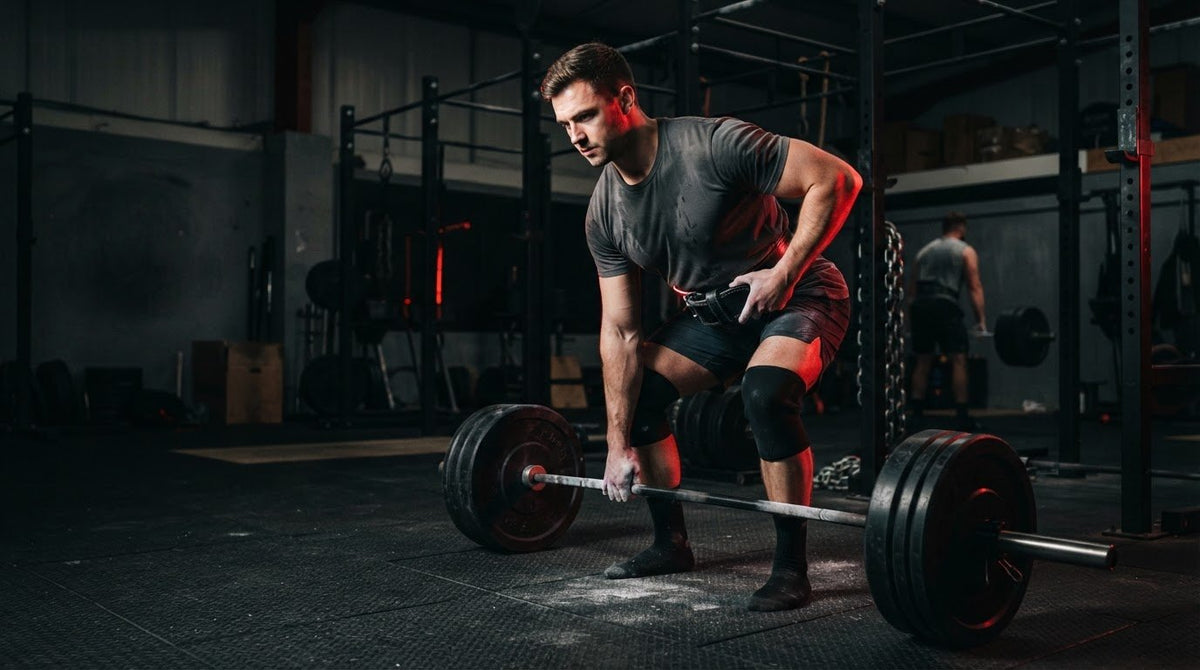
Setting your lifting belt at the exact same height for deadlifts as you do for squats is one of the fastest ways to compromise your pull. While a squat demands a more upright torso, optimal deadlift belt placement must accommodate deep hip flexion before anything else. If you've ever had stiff leather dig painfully into your floating ribs or pinch your hip bones as you reach for the barbell, you know how frustrating it is when your gear fights your setup.
You don't need to put up with severe bruising or an awkward starting position just to protect your back. By learning to dial in your belt position according to your unique torso length and pulling stance, you can establish powerful 360-degree intra-abdominal pressure, lock in a flat spine, and move heavier weight with complete confidence. In this guide, we cover practical methods to assess your anatomy, test different belt heights and angles, and secure your ideal setup for every working set.
Key Takeaways
- Fine-tuning your deadlift belt placement between the lower ribs and iliac crest creates an unyielding wall for intra-abdominal pressure while keeping your lumbar spine neutral.
- Adjust your belt height based on your pulling mechanics, as conventional pulls typically require higher clearance for forward torso lean than upright sumo stances.
- Always test your belt latching while fully hinged into your starting grip rather than standing upright to eliminate rib pinching and skin bruising off the floor.
- Selecting the right belt profile, such as a flexible 10mm leather construction over a rigid 13mm slab, can significantly improve your hip mobility at the bottom of the lift.
Understanding Deadlift Belt Placement: Biomechanics and Anatomy
Dialling in your deadlift belt placement requires a clear understanding of your anatomy. While many lifters treat a belt as passive lumbar support, a quality weightlifting belt functions primarily as a rigid artificial wall. By bracing your abdominal wall outward against this boundary, you create substantial intra-abdominal pressure that stabilises the spine under heavy loads.
Squat mechanics favour a relatively upright trunk, allowing a belt to sit squarely across the midsection without impedance. A deadlift setup, however, demands acute hip flexion and forward torso incline. If you fasten the belt using your upright squat position, the leather quickly pinches the hip flexors and prevents you from setting a flat, neutral spine before the bar leaves the floor.
To see how professional strength coaches address these anatomical challenges, watch this practical guide:
Key Anatomical Landmarks to Navigate
Positioning hinges entirely on your torso dimensions. The prime target is the soft-tissue gap between your lower floating ribs and the iliac crest of your pelvis. Lifters with shorter torsos often find a standard 10cm wide strap compresses both bony margins simultaneously. Securing supportive weight lifting belts slightly higher up the rib cage prevents deep pelvic bruising while preserving full hip mobility at the bottom of the pull.
The Role of Intra-Abdominal Pressure in the Pull
True stability comes from 360-degree bracing. When you draw air into your abdomen, your diaphragm descends and forces your core outward against the leather circumference. If your deadlift belt placement sits too low or tilts unevenly over the hips, you bleed tension at the start of the lift, forcing the spinal erectors to handle unnecessary shearing forces off the floor.
Conventional vs Sumo: Matching Belt Position to Your Stance
Pulling styles fundamentally alter hip kinematics and spinal angles. Strength coaches frequently highlight the importance of the deadlift for building posterior chain resilience, but your stance dictates how your torso interfaces with supportive leather. A conventional setup demands an acute forward torso angle, while a sumo pull keeps the trunk far more upright. Consequently, optimal deadlift belt placement cannot remain identical across both disciplines without compromising setup mechanics.
Conventional Deadlift Placement Considerations
In a conventional pull, deep hip flexion often jams a wide belt directly into the thighs or anterior hip points. Positioning the strap an inch or two higher, just below the lower ribs, eliminates this pinch point entirely. Lifters with shorter torsos frequently benefit from angling the front buckle slightly upward. This tilt keeps the rear leather seated firmly over the lumbar-thoracic junction while ensuring your pelvis hinges cleanly into position without restriction.
Sumo Deadlift Placement Considerations
Sumo lifters rely on a wide stance and intense external hip rotation, which naturally keeps the pelvis tucked closer to the barbell. Because your torso remains comparatively vertical off the floor, you rarely encounter the severe pinch associated with a closed hip angle. Setting your belt level across the navel is typically best. This symmetrical alignment lets you expand directly against competition-ready Team Industry Lifting Belts, creating uniform abdominal pressure to break the floor with speed.
How to Find Your Optimal Deadlift Belt Position: 4 Actionable Steps
Locking in dependable deadlift belt placement takes deliberate calibration rather than guesswork on the platform. Follow this practical four-step sequence during your warm-up sets:
- Set baseline clearance: Wrap the belt loosely around your midsection, positioning the leather evenly between the lower edge of your ribcage and the crest of your hips.
- Hinge before clamping: Drop down into your actual starting grip on the barbell before securing the latch. Fastening the leather while hinged immediately reveals if the edges dig into your thighs.
- Apply the two-finger rule: Check the tension before final locking. You should be able to slide two flat fingers comfortably between your abdomen and the leather.
- Confirm 360-degree expansion: Take a deep diaphragmatic breath into your stomach, obliques, and lower back. The leather must resist your expansion evenly around your entire midsection.
Testing Belt Tightness for Maximum Pulling Power
Overtightening is a common pitfall. Cranking the lever too far restricts the diaphragm from descending, cutting your air intake and starving intra-abdominal pressure. When calibrated properly, the belt acts as a rigid boundary for your core to push out against, reinforcing spinal stability without suffocating your starting position.
Troubleshooting Common Setup Errors
If the lower edge bites hard into your hips, shift the entire loop one centimetre higher or angle the buckle upward. A belt positioned too low often blocks hip flexion, forcing the lumbar spine into compensatory rounding off the floor. Once your belt is dialled in, pair your setup with reliable pulling accessories; explore our lifting straps to lock in your grip and maximise pulling power on heavy working sets.
Dialling In Your Gear: Selecting Belts and Accessories for Deadlifts
Finding your ideal deadlift belt placement works best when supported by the right hardware. Stiff leather gear must accommodate your personal mechanics rather than fight them off the platform. Heavy-duty lever belts are especially valuable for pulling. Precision steel lever mechanisms clamp to the exact same notch every single set, ensuring your bracing surface remains completely consistent through heavy warm-ups and maximal attempts.
10Mm vs 13mm Belts for the Deadlift
Leather thickness directly influences your mobility at the bottom of the pull. While competitors in heavier weight classes often favour the maximum structural rigidity of a 13mm belt, a 10mm profile is typically the most versatile choice for deadlifting. It moulds quickly to your waistline, offers slight flexibility when wedging your hips to the bar, and significantly reduces painful pinching against the floating ribs. You can assess both options within the Team Industry weight lifting belts collection to match your frame.
Completing Your Pulling Arsenal
Maintaining correct deadlift belt placement protects your spine, but total platform performance requires a complete setup. Grip fatigue often creeps in before core stability wavers, causing the shoulders to roll forward and pulling your lumbar spine out of alignment. Pairing your belt with heavy-duty lifting straps keeps the bar locked into your hands during demanding volume blocks. For long-term training progression, explore our full selection of Team Industry strength equipment to outfit your gym bag with dependable tools.
Lock In Your Setup for Heavier, Pain-Free Pulls
Refining your deadlift belt placement transforms the way you brace off the floor. Setting the leather to accommodate your hip hinge rather than mimicking a vertical squat stance keeps your spine neutral, protects your ribs from bruising, and delivers a solid foundation for explosive power. Whether you pull conventional with a higher belt angle or sumo with a flat midsection fit, deliberate positioning makes every repetition feel secure.
Consistency in your setup demands equipment that performs rep after rep. Built with high-grade leather for unmatched structural rigidity, our gear is trusted by competitive strength athletes across the United Kingdom. Precision-engineered steel lever buckles deliver instant, consistent locking at your exact tension setting every time you step onto the platform. Ready to lock in your pull? Explore competition-ready Team Industry weight lifting belts built for maximum stability. Step up to the barbell with complete confidence.
Frequently Asked Questions
Should my deadlift belt be in the exact same position as my squat belt?
Not necessarily, and many lifters find they need different positions for each movement. Squatting requires an upright torso, which allows a belt to sit level around the navel. Deadlifting forces you into deep hip flexion, meaning that identical squat height can pinch your thighs or lower ribs. Experimenting with a slightly higher deadlift belt placement often gives you the clearance needed to reach the bar cleanly.
Why does my lifting belt bruise my ribs or hips when deadlifting?
Bruising occurs when stiff leather directly compresses bony landmarks like the iliac crest or lower floating ribs during the hip hinge. Because your torso folds forward at the start of the pull, standard 10cm belts can become pinched between your ribcage and pelvis. Shifting the belt slightly higher or angling the buckle upward keeps the leather seated over soft tissue rather than crushing bone.
How tight should a lifting belt be for deadlifts compared to squats?
A deadlift belt should typically be one notch looser than your squat setting. Deep hip flexion compresses your abdominal cavity before you pull, making maximum diaphragmatic expansion much harder. Leaving enough space to slip two flat fingers between your stomach and the leather ensures you can draw a full 360-degree breath into your abdomen and obliques, creating stronger intra-abdominal pressure off the platform.
Is a 10mm or 13mm belt better for deadlift placement?
A 10mm belt is generally better for deadlift belt placement because it breaks in faster and offers more pliability around your ribcage and hips. While a 13mm lever belt provides unmatched rigidity for maximal squats or super-heavyweight lifters, the thinner profile of a 10mm leather belt lets you drop into your starting pull position without rigid edges obstructing your hip wedge.
Can wearing a belt too low cause my back to round off the floor?
Yes, setting your belt too low frequently forces your lower back to round. If the bottom edge sits over your hip joints, it physically blocks the pelvis from rotating forward as you set your grip. Unable to achieve clean hip flexion, your lumbar spine compensates by rounding to reach the bar, which bleeds starting power and places excessive shearing stress on your back.
Share:
The Ultimate Guide to stiff wrist wraps
The Ultimate Guide to deadlifting